For most organizations, a healthy
security stance is essential to protecting and preserving Microsoft
SharePoint content. Depending on your industry, you might even be bound
by regulations that require you to secure and audit access to some
content.
Certainly, security is a broad topic that involves not only SharePoint farm administrators, but server, network, and database admins as well. Through delegation to site collection admins and site owners in the business units, security also involves day-to-day end users.
To effectively enforce business-driven information-management policies, collaboration with the business is also necessary.
In response to the vast number of interested security stakeholders, SharePoint 2010 offers a flexible security model that supports multiple authentication types and multiple levels of permission authorization.
But this flexibility has a downside: Without a clear, published strategy for how permission management should be performed in your organization, security chaos can make day-to-day usage quite painful.
With all these variables, it's no wonder that security can become a complex equation.
Rest assured that armed with a clear understanding of your security requirements, some technical guidance, and bit of common sense, you can build a security model that is both effective and sustainable.
In this three-part series, we aim to provide you with this technical guidance -- and we'll throw in some best practices for good measure.
In this article, I'll start off with the basics, provide you with several step-by-step procedures, and make sure that you have a good overall understanding of the SharePoint authorization model. The focus will be on the farm and work through web applications and site collections, down to individual sites, lists, libraries, and items. In Part 2, Kevin Laahs will focus on claims-based authentication; in Part 3, Todd Klindt will talk about hardening your SharePoint servers.

Figure 1: SharePoint's logical hierarchy
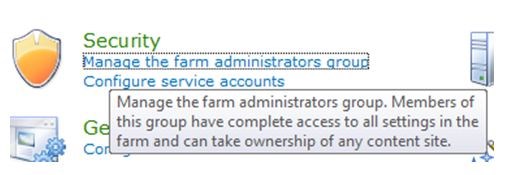
Farm administrator access is granted by adding Active Directory (AD) users or security groups to the farm administrators group within Central Administration:
1. Within Central Administration, click Security and then select Manage The Farm Administrators Group.
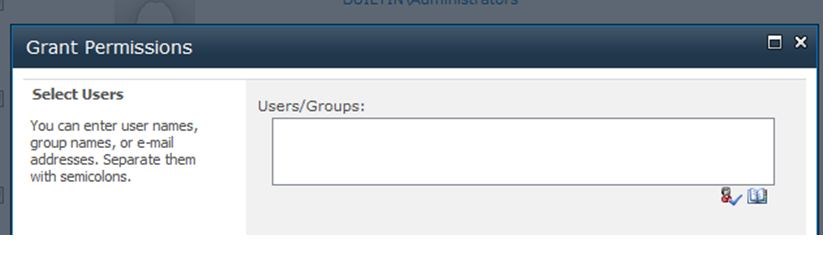
2. Add or remove AD users or groups as needed.
Security note: To perform certain administrative tasks such as creating web applications, you also need to be a local Windows administrator on the web server (or servers) that run the Central Administration web application.
To grant permissions for others to run PowerShell commands, use the Add-SPShellAdmin cmdlet. This command grants necessary permissions on SharePoint servers, the configuration database, and (optionally) a SharePoint content database. If you run this command without specifying a database, then the user is granted access to the farm only, not to any content databases. To grant a user the ability to run all cmdlets within a content database (e.g., to use Get-SPWeb to return a site), use the -database switch to grant the user access to the content database.
Security note: To use the Add-SPShellAdmin cmdlet to grant PowerShell access, you must be a farm administrator, a local administrator on the server on which the command is run, and a security admin on the database server (or servers) to which you are granting permission.
To adjust permissions to content within a web application, change the user policy for the web application. You can make this change in Central Administration:
1. Within Central Administration, click Application Management.
2. Select Manage Web Applications.
3. Highlight the web application and click the User Policy button in the Ribbon.
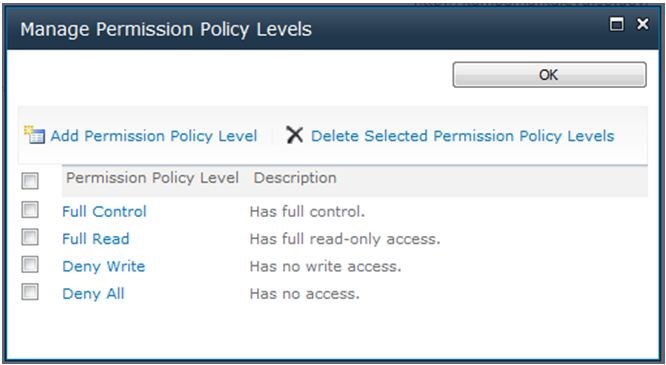
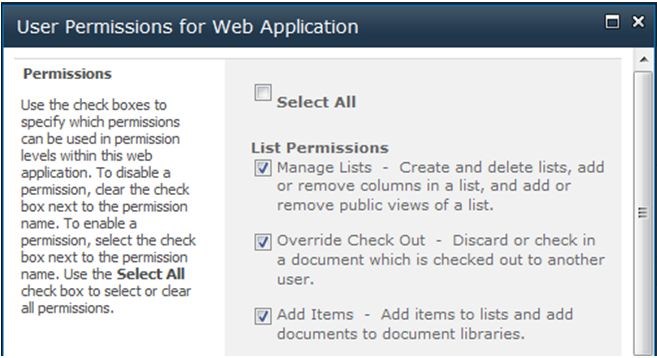
4. Add or deny permissions, as needed.
Security Note: Because permissions can also be set for individual site collections (which I cover in the next section), permissions aren't usually granted this way. This method is very powerful and is used for special purposes. For example, you might decide to use it to grant read-only access to auditors, to ensure that they have access to all site collections in the web application. Furthermore, this web application policy is the only method for denying someone access to SharePoint. This setting takes precedence over any other permission that is granted. Also, none of the permissions that you grant here are visible at a lower level. For example, a site collection administrator can't see who has been granted permissions through the web application policy. Again, this method of setting permissions is powerful but potentially confusing and dangerous -- so use it with caution!
1. Within Central Administration, click Application Management.
2. Select Manage Web Applications.
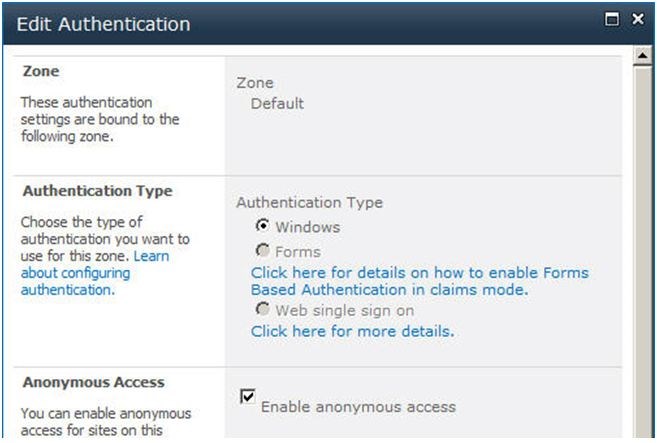
3. Highlight the web application and click the Authentication Providers button in the Ribbon.
4. Select the zone. (A zone allows you to expose a web application with a unique URL. You can have as many as five zones per web application. All zones have access to the content databases and site collections that are associated with that web application.)
5. Select the Enable Anonymous Access check box and click Save.
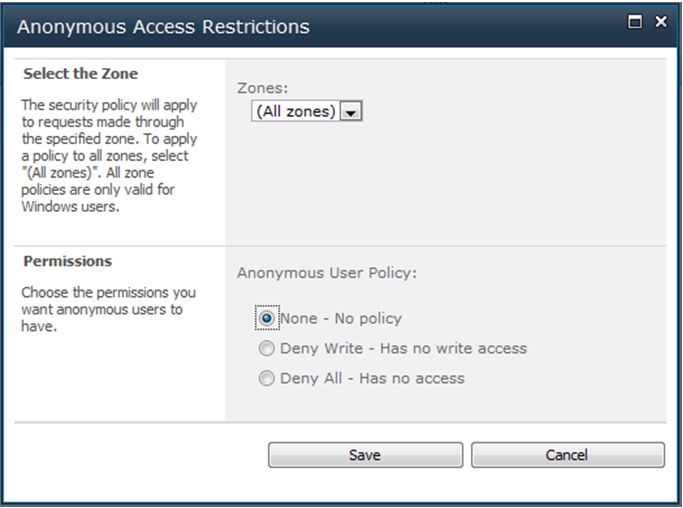
Security note: By default, anonymous users have no access to site collections until that permission is granted. Therefore, after anonymous access has been enabled, you must set which permissions anonymous users have. (I cover this topic in the Grant Anonymous Access section of this article.)
By default, permissions are inherited or cascade down to all websites, lists, libraries, folders, and items in the site collection hierarchy. Thus, permissions that are granted to the top-level site also apply to a document buried deep within a site collection. As you'll learn, this inheritance can be stopped.
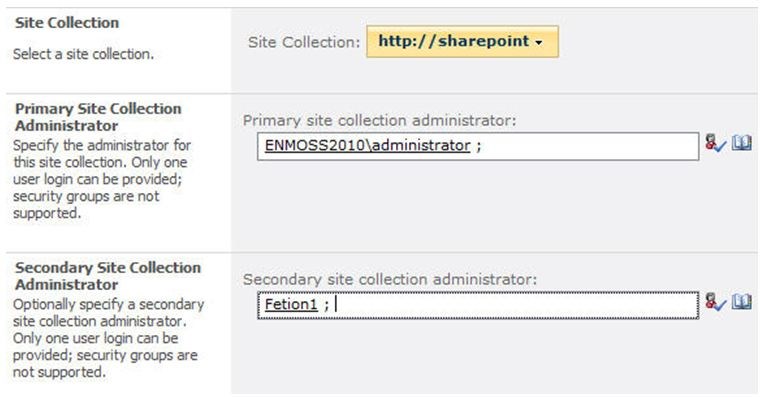
The highest level of access within a site collection belongs to the site collection administrator. This user has implicit access to all SharePoint content (e.g., sites, lists, libraries, items) within the site collection, whether or not permission is specifically granted. Through Central Administration, a farm admin can specify up to two site collection administrators for each site collection. Within each site collection, however, a site collection administrator can add additional admins as needed.
You grant regular users (i.e., non-administrators) access through the site collection. In fact, each site collection is administered separately, making these collections very convenient administrative units that can be delegated out. Because administration occurs from within the site collection (and not Central Administration), administrative tasks are often assigned to trained business users, empowering them to be somewhat self-supporting. Of course, depending on your site collection architecture, this administrative boundary can become a challenge. For example, if you need to grant access to multiple site collections, that access must be granted one collection at a time for each user or group of users.
Security Note: If a user tries to access a site to which they don't have permissions, of course they get an access denied error. But you can have the user request access from this error page. To learn more, see " How to Manage SharePoint Site Access Requests."
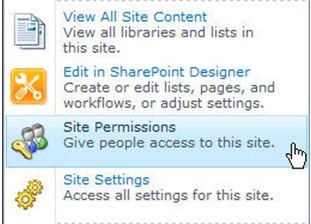
1. Within the site collection, go to the Site Actions menu and select Site Permissions.
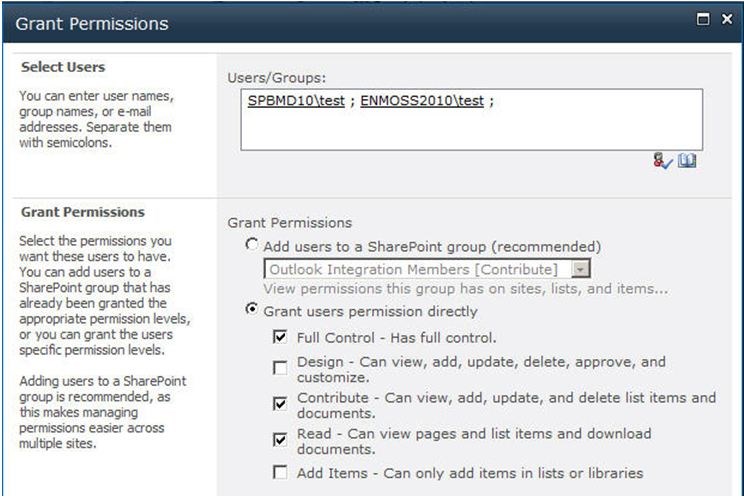
2. On the Ribbon, click the Grant Permissions button.
3. In the dialog box, select individual users, SharePoint groups, or AD security groups.
4. Specify whether you want to add these users to a SharePoint group or to grant permissions directly. (Note: If you selected one or more SharePoint groups in step 3, you can only grant permissions directly.)
5. Optionally, send these users a welcome email.
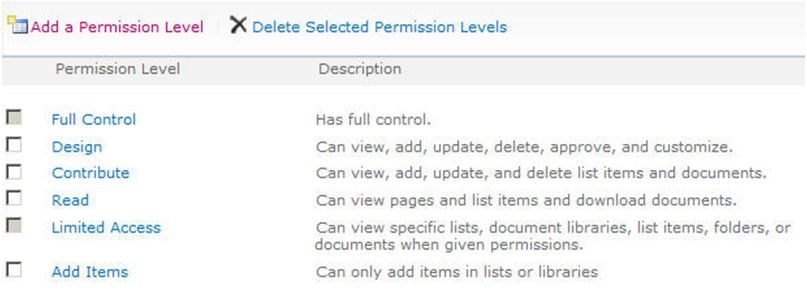
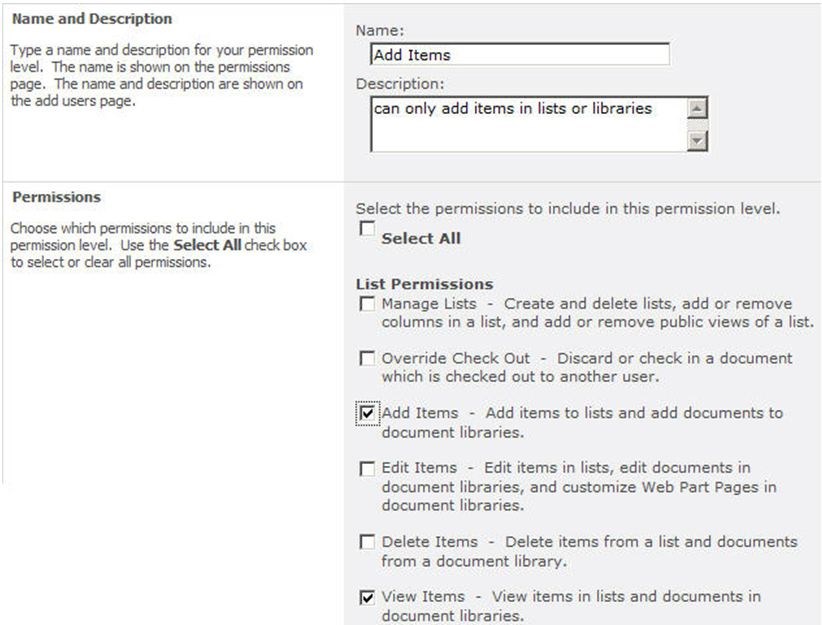
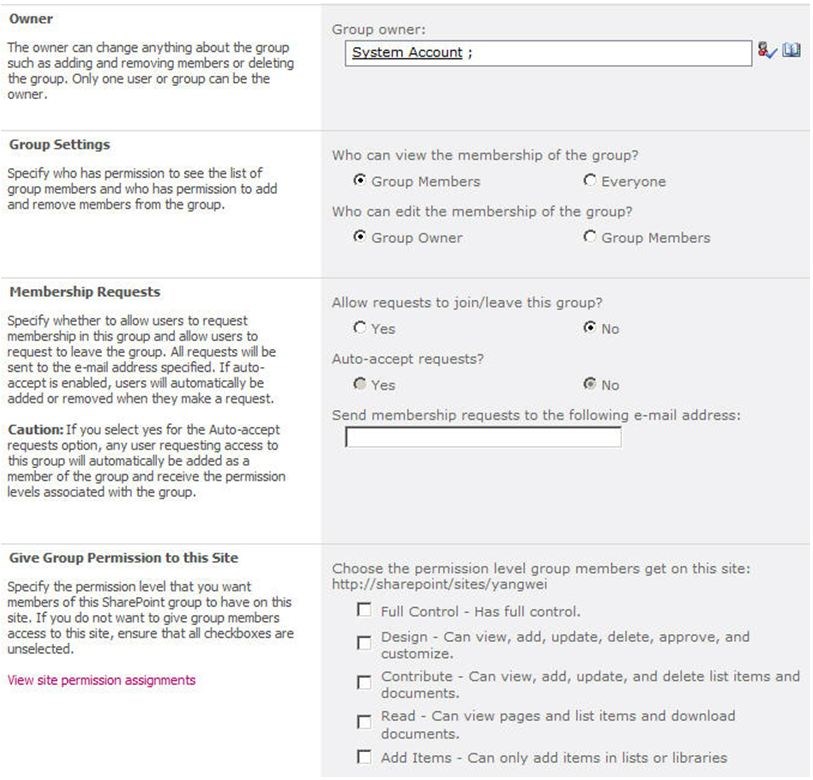
When creating a new SharePoint group, you can also assign permissions to the group. Doing so makes permission assignment easy because you need only add users into the group. You can create new SharePoint groups from the same Site Permission screen on which you grant permissions.
Security note: When creating a new site collection, three default SharePoint groups are created automatically: owners (who have Full Control access), members (who have Contribute access), and visitors (who have Read-Only access).
You can no doubt think of cases in which you need to establish unique permissions for a certain level. For example, you might want to protect a subsite and ensure that only managers have access. Within SharePoint, you can stop this permission inheritance on four different objects within the site collection: sites, lists/libraries, folders, and items. When you stop inheriting permissions, you can establish a unique ACL for that object, which then cascades to lower levels. This gives you a great deal of flexibility to mold a specific set of permissions around your content. However, be careful: The more you stop inheritance, the more complex permission management becomes over time. Another troublesome side effect of stopping inheritance too often is that it can drastically affect SharePoint's performance. As a general rule, stopping inheritance should be the exception, and you are encouraged to structure your sites, libraries, and folders accordingly. Figure 2 depicts an example of permission inheritance.

Figure 2: Permission inheritance in action The basic steps to stop inheritance and assign permissions are the same, regardless of the object type. For a site, use the Site Permissions link in the Site Actions menu. For a list or library, use the list's or library's settings page. For a folder or item, use the object's context menu, sometimes called the edit control block. If inheritance is stopped on an object, you can revert back to inherit, but any custom permissions that you applied will be lost.
Security note: Despite your best efforts, permission management can still spiral out of control. Another way to alleviate this is to have a good governance plan that gives administrative end users clear guidance about how to use groups and when or if to stop inheritance. Another option is to use third-party software such as AvePoint's DocAve Administrator, which can help manage permissions across the whole farm in one operation. Tools like this also help enforce a security policy as defined in a governance plan.
1. Access the permissions page for the object, as described in the previous section.
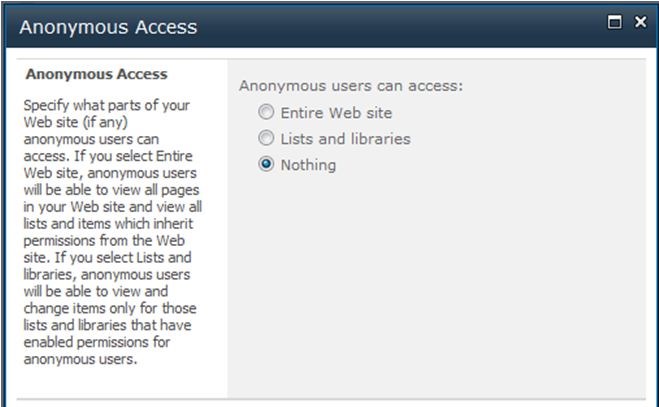
2. If necessary, click the Stop Inheriting Permissions button in the Ribbon. (You can't adjust anonymous access on an object that inherits permissions from its parent.)
3. In the Ribbon, click the Anonymous Access button.
4. Choose the permissions to grant to anonymous users. The available permissions will vary depending on the type of object.
5. Click OK to save.
Reference:
http://sharepointpromag.com/sharepoint-2010/sharepoint-security-101-what-you-need-know-secure-sharepoint
Certainly, security is a broad topic that involves not only SharePoint farm administrators, but server, network, and database admins as well. Through delegation to site collection admins and site owners in the business units, security also involves day-to-day end users.
To effectively enforce business-driven information-management policies, collaboration with the business is also necessary.
In response to the vast number of interested security stakeholders, SharePoint 2010 offers a flexible security model that supports multiple authentication types and multiple levels of permission authorization.
But this flexibility has a downside: Without a clear, published strategy for how permission management should be performed in your organization, security chaos can make day-to-day usage quite painful.
With all these variables, it's no wonder that security can become a complex equation.
Rest assured that armed with a clear understanding of your security requirements, some technical guidance, and bit of common sense, you can build a security model that is both effective and sustainable.
In this three-part series, we aim to provide you with this technical guidance -- and we'll throw in some best practices for good measure.
In this article, I'll start off with the basics, provide you with several step-by-step procedures, and make sure that you have a good overall understanding of the SharePoint authorization model. The focus will be on the farm and work through web applications and site collections, down to individual sites, lists, libraries, and items. In Part 2, Kevin Laahs will focus on claims-based authentication; in Part 3, Todd Klindt will talk about hardening your SharePoint servers.
SharePoint's Logical Hierarchy
Before we get into setting permissions, let's review the basic terminology of a SharePoint environment. A SharePoint farm refers to all the servers (i.e., web front end, application servers, and database servers) that work together to provide a SharePoint service to users. Within the farm, a structured hierarchy organizes content, as Figure 1 shows. The purpose of this hierarchy is to organize and secure the vast amount of content within SharePoint.
Figure 1: SharePoint's logical hierarchy
Securing the Farm
Despite the enormous responsibility that it implicates, securing the farm is quite a simple process. Permissions are mostly cut and dried: You're either a farm admin, or you aren't. A farm admin has full control over the farm, including managing web applications, starting and stopping services, backing up or restoring the farm -- effectively, any task that can be found in Central Administration, SharePoint's web-based administration interface. A farm administrator can also grant anyone access to any and all content within SharePoint. Indeed, the farm admin role is a powerful one, and you should be cautious about who is granted this level of access.Farm administrator access is granted by adding Active Directory (AD) users or security groups to the farm administrators group within Central Administration:
1. Within Central Administration, click Security and then select Manage The Farm Administrators Group.
2. Add or remove AD users or groups as needed.
Security note: To perform certain administrative tasks such as creating web applications, you also need to be a local Windows administrator on the web server (or servers) that run the Central Administration web application.
Granting PowerShell Access
Although Central Administration is commonly used for many day-to-day operations, Windows PowerShell is an incredibly powerful way to administer and automate SharePoint functions from a command-line interface. (To learn more about using PowerShell with SharePoint, see " Using Windows PowerShell to Manage SharePoint 2010 " and " SharePoint Administrators Can Learn to Love PowerShell .")To grant permissions for others to run PowerShell commands, use the Add-SPShellAdmin cmdlet. This command grants necessary permissions on SharePoint servers, the configuration database, and (optionally) a SharePoint content database. If you run this command without specifying a database, then the user is granted access to the farm only, not to any content databases. To grant a user the ability to run all cmdlets within a content database (e.g., to use Get-SPWeb to return a site), use the -database switch to grant the user access to the content database.
Security note: To use the Add-SPShellAdmin cmdlet to grant PowerShell access, you must be a farm administrator, a local administrator on the server on which the command is run, and a security admin on the database server (or servers) to which you are granting permission.
Securing a Web Application
A web application is a user's entry point into SharePoint. Specifically, a web application consists of one or more Microsoft Internet Information Server (IIS) websites that control how users are authenticated (or not authenticated, if you allow anonymous access). Organizations commonly have multiple web applications to isolate certain types of content or sets of users, such as a Record Center or extranet, respectively. When granting permissions to a web application, the sole purpose is to control who has access to the content within the site collections that are associated with the web application. In other words, you cannot grant permissions to administer a web application; only farm admins can do that, and they have administrative control over all web applications.To adjust permissions to content within a web application, change the user policy for the web application. You can make this change in Central Administration:
1. Within Central Administration, click Application Management.
2. Select Manage Web Applications.
3. Highlight the web application and click the User Policy button in the Ribbon.
4. Add or deny permissions, as needed.
Security Note: Because permissions can also be set for individual site collections (which I cover in the next section), permissions aren't usually granted this way. This method is very powerful and is used for special purposes. For example, you might decide to use it to grant read-only access to auditors, to ensure that they have access to all site collections in the web application. Furthermore, this web application policy is the only method for denying someone access to SharePoint. This setting takes precedence over any other permission that is granted. Also, none of the permissions that you grant here are visible at a lower level. For example, a site collection administrator can't see who has been granted permissions through the web application policy. Again, this method of setting permissions is powerful but potentially confusing and dangerous -- so use it with caution!
Allowing Anonymous Access
Anonymous access allows non-authenticated (i.e., guest) users to access a SharePoint web application. Anonymous access is commonly used for Internet-facing sites but can also be used for intranets. Anonymous access can be enabled whether you use claims or classic authentication. Here's how you enable anonymous access:1. Within Central Administration, click Application Management.
2. Select Manage Web Applications.
3. Highlight the web application and click the Authentication Providers button in the Ribbon.
4. Select the zone. (A zone allows you to expose a web application with a unique URL. You can have as many as five zones per web application. All zones have access to the content databases and site collections that are associated with that web application.)
5. Select the Enable Anonymous Access check box and click Save.
Security note: By default, anonymous users have no access to site collections until that permission is granted. Therefore, after anonymous access has been enabled, you must set which permissions anonymous users have. (I cover this topic in the Grant Anonymous Access section of this article.)
Securing a Site Collection
Although you can grant permissions to multiple site collections through the web application policy, save this method for special circumstances. Users are authenticated at the web application level and authorization is typically performed at the site collection level. In other words, for regular, day-to-day permission management, you should assign permissions via site collections.By default, permissions are inherited or cascade down to all websites, lists, libraries, folders, and items in the site collection hierarchy. Thus, permissions that are granted to the top-level site also apply to a document buried deep within a site collection. As you'll learn, this inheritance can be stopped.
The highest level of access within a site collection belongs to the site collection administrator. This user has implicit access to all SharePoint content (e.g., sites, lists, libraries, items) within the site collection, whether or not permission is specifically granted. Through Central Administration, a farm admin can specify up to two site collection administrators for each site collection. Within each site collection, however, a site collection administrator can add additional admins as needed.
You grant regular users (i.e., non-administrators) access through the site collection. In fact, each site collection is administered separately, making these collections very convenient administrative units that can be delegated out. Because administration occurs from within the site collection (and not Central Administration), administrative tasks are often assigned to trained business users, empowering them to be somewhat self-supporting. Of course, depending on your site collection architecture, this administrative boundary can become a challenge. For example, if you need to grant access to multiple site collections, that access must be granted one collection at a time for each user or group of users.
Security Note: If a user tries to access a site to which they don't have permissions, of course they get an access denied error. But you can have the user request access from this error page. To learn more, see " How to Manage SharePoint Site Access Requests."
Understanding SharePoint Groups
Like many other systems, SharePoint uses the notion of groups to simplify the assignment of permissions to multiple users. Note that SharePoint groups are specific to a site collection. Thus, you cannot use one SharePoint group to span multiple site collections. Again, this can be a blessing (when you want administrative separation) or a curse (when you don't). Also, SharePoint groups can't be nested, meaning that you can't place one SharePoint group within another. Some of these limitations don't apply to AD security groups, however. For example, you can assign one AD group permissions to multiple site collections. To better understand your options, here are the different ways permissions within a site collection can be granted:- Add one or more users to a SharePoint group and grant that group permissions.
- Add one or more users to an AD security group and grant that group permissions.
- Add one or more users to an AD security group, add the AD group to a SharePoint group (this type of nesting is allowed), and grant the SharePoint group permissions.
- Grant permissions directly to one or more users, without using groups.
1. Within the site collection, go to the Site Actions menu and select Site Permissions.
2. On the Ribbon, click the Grant Permissions button.
3. In the dialog box, select individual users, SharePoint groups, or AD security groups.
4. Specify whether you want to add these users to a SharePoint group or to grant permissions directly. (Note: If you selected one or more SharePoint groups in step 3, you can only grant permissions directly.)
5. Optionally, send these users a welcome email.
When creating a new SharePoint group, you can also assign permissions to the group. Doing so makes permission assignment easy because you need only add users into the group. You can create new SharePoint groups from the same Site Permission screen on which you grant permissions.
Security note: When creating a new site collection, three default SharePoint groups are created automatically: owners (who have Full Control access), members (who have Contribute access), and visitors (who have Read-Only access).
Permission Inheritance
By default, permissions that are set for the top-level site within a site collection apply to all content in the site collection hierarchy (as Figure 1 shows). This concept is called permission inheritance and it helps to simplify permission management.You can no doubt think of cases in which you need to establish unique permissions for a certain level. For example, you might want to protect a subsite and ensure that only managers have access. Within SharePoint, you can stop this permission inheritance on four different objects within the site collection: sites, lists/libraries, folders, and items. When you stop inheriting permissions, you can establish a unique ACL for that object, which then cascades to lower levels. This gives you a great deal of flexibility to mold a specific set of permissions around your content. However, be careful: The more you stop inheritance, the more complex permission management becomes over time. Another troublesome side effect of stopping inheritance too often is that it can drastically affect SharePoint's performance. As a general rule, stopping inheritance should be the exception, and you are encouraged to structure your sites, libraries, and folders accordingly. Figure 2 depicts an example of permission inheritance.

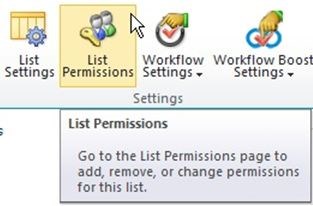
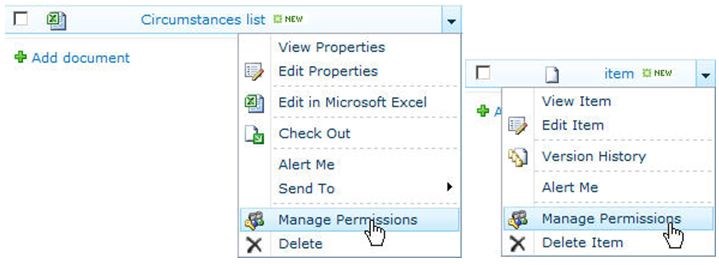
Figure 2: Permission inheritance in action The basic steps to stop inheritance and assign permissions are the same, regardless of the object type. For a site, use the Site Permissions link in the Site Actions menu. For a list or library, use the list's or library's settings page. For a folder or item, use the object's context menu, sometimes called the edit control block. If inheritance is stopped on an object, you can revert back to inherit, but any custom permissions that you applied will be lost.
Security note: Despite your best efforts, permission management can still spiral out of control. Another way to alleviate this is to have a good governance plan that gives administrative end users clear guidance about how to use groups and when or if to stop inheritance. Another option is to use third-party software such as AvePoint's DocAve Administrator, which can help manage permissions across the whole farm in one operation. Tools like this also help enforce a security policy as defined in a governance plan.
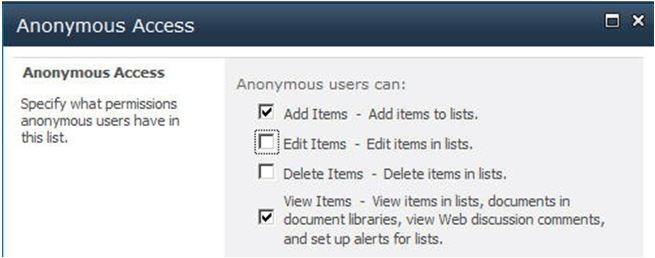
Granting Anonymous Access
If the web application is configured to allow anonymous access, you can adjust which permissions an anonymous user receives:1. Access the permissions page for the object, as described in the previous section.
2. If necessary, click the Stop Inheriting Permissions button in the Ribbon. (You can't adjust anonymous access on an object that inherits permissions from its parent.)
3. In the Ribbon, click the Anonymous Access button.
4. Choose the permissions to grant to anonymous users. The available permissions will vary depending on the type of object.
5. Click OK to save.
Wrapping Up
Hopefully, this security overview wasn't too painful and served as a useful refresher for those who have a SharePoint background. By now, you should understand SharePoint's authorization capabilities and some of its limitations. You've learned how to define farm and PowerShell administrators, adjust a web application's user policy, and configure each of the four permissionable objects (i.e., site, list/library, folder, and item) within a site collection. I've also given you some quick steps to enable anonymous access and set anonymous permissions. In the next article of this series, Kevin Laahs will focus on authentication, specifically the claims-based authentication support in SharePoint 2010. Until then, be safe and secure.Reference:
http://sharepointpromag.com/sharepoint-2010/sharepoint-security-101-what-you-need-know-secure-sharepoint