Monday, 1 December 2014

Connected Web Parts in SharePoint 2010 - an Architectural Framework


This article has been co-authored by Lavanya Kammari (Main Author), Nataraj Yadavalli (Main Author) and Mark Kendall.
Creating an Enterprise Portal can be a daunting task when you are using custom Webparts in just about all cases and you want to be able to communicate with the other web parts, via some sort of custom navigation system. Microsoft has done a good job creating the framework, but not so good of a job explaining how to use the connected Webpart Framework. See this article for a brief overview. http://msdn.microsoft.com/en-us/library/ms469765.aspx.
In this article, we will rely on our experience as a team, who has actually implemented a successful connected Webparts Enterprise Portal, and hope that it will help you implement your own version.
The main advantage of connected Webparts is to exchange data between web parts at run time. For this, we should have at least two web parts one for provider and the other for consumer. Provider web part will pass data to the consumer web part. Here we will explain the required steps to create connectable web parts in Visual Studio 2010 using Visual Webpart template.
Basic Steps
Creating the web part connection interface.
  1. Creating a Web Part by using the Visual Studio Visual Web Part item template.
  2. Creating a provider Web Part that defines a string.
  3. Creating a consumer Web Part that uses and displays the string.
  4. Creating a Web Part page and connecting the provider and consumer Web Parts.
  5. Adding code-behind in Visual Web Parts to handle post back properly
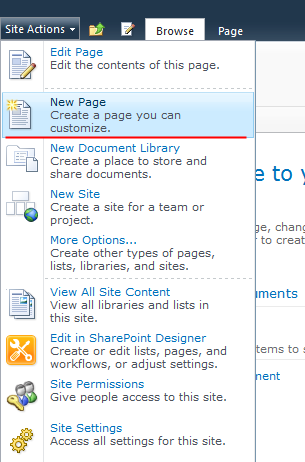
Before we begin with our steps, let’s start by creating an empty solution which will be used later in our steps.
empty-sharepoint-solution
sharepoint-wizard
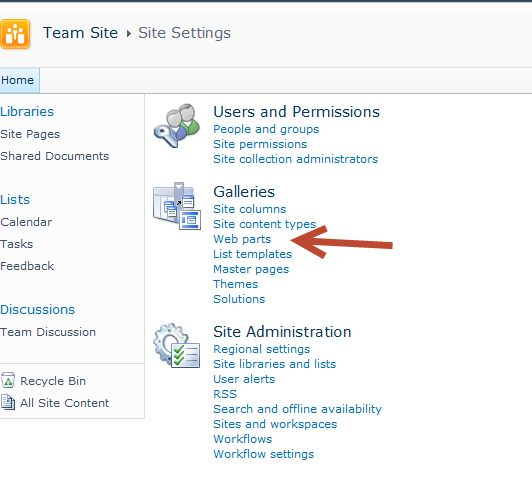
Step 1: Creating the web part connection interface:
SharePoint uses an interface to communicate/ exchange data between the web parts. Now we will create an interface called ‘iConnectableNavigation’, which has a method to get the selected Category.
Right click on your solution and Click ‘Add new item’ and select ‘Interface’ to create an interface.
sharepoint-new-interface
Once you have created ‘iConnectableNavigation’ interface, add the following code.
iconnectable-interface
Step 2: Creating a Web Part by using the Visual Studio Visual Web Part item template -
In Visual Studio 2010, you can create two types of Web Parts. The first type, Visual web part, creates a user control and deploys this in content Template. Here all controls can be created using the design mode. The other one is a default web part, which inherits from ‘System.Web.UI.WebControls.WebParts’ namespace. Here you have to define all the controls in code behind.
In this article, we are creating ‘Visual Web Parts’ for both provider and consumer.
Step 3: Creating a provider Web Part that defines a string:
Now we create a provider visual web part, which has a drop down of Categories. When user selects an item from the drop down, that value will be provided as string for other webparts which are consumers.
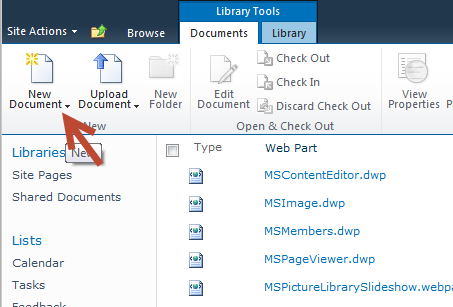
To create a provider web part, right click on the solution and select add a new item. Select “Visual Web Part” template and Name it as “CategoryNavigationWP”. Once you click “Add”, all the required files are created for you.
visual-web-part
connected-web-parts
 
Now open CategoryNavigationWPUserControl.ascx file and add the dropdown and all necessary code.
Add a public method called GetCategoryType which returns the selected drop down item text.
get-category-type
 
Now Open CategoryNavigationWP.cs file and update code as shown below.
category-navigationwp
Note the Attribute on the GetProvider Method. This Attribute must be placed on all webparts that implement the interface. It’s name can be anything you want- in this example Category Provider.
Step 4: Creating a consumer Web Part that uses and displays the string.
Follow the same steps as in Provider web part and create a Visual Web part called ‘CategoryResultsWP’ as a consumer web part and update code as shown below.
visual-web-part1
category-results-wp
category-results-wp1
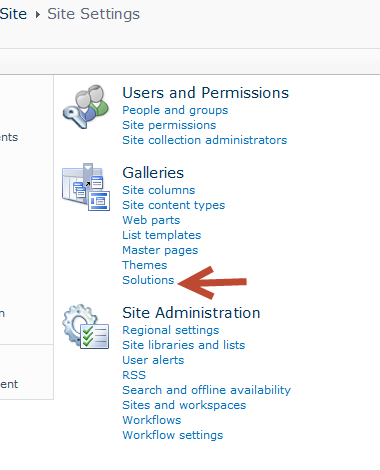
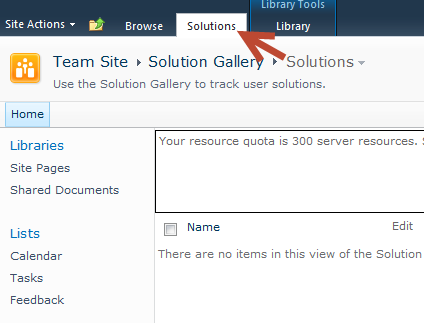
Step 5: Creating a Web Part page and connecting the provider and consumer Web Parts.
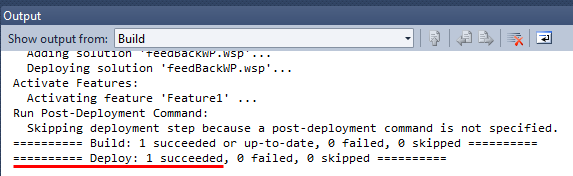
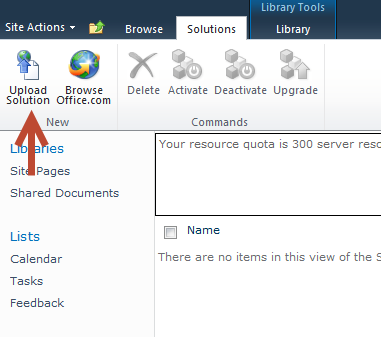
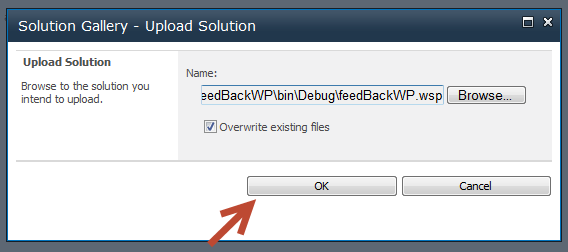
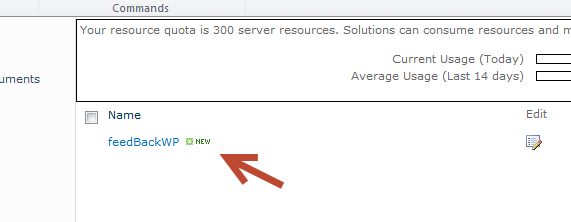
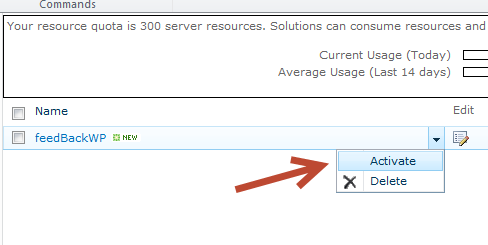
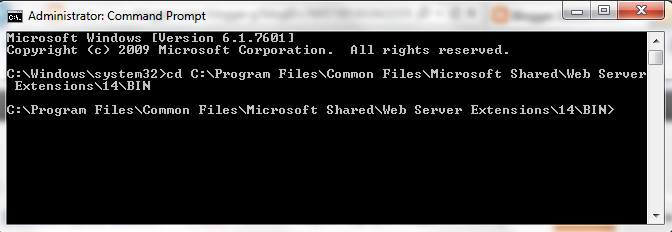
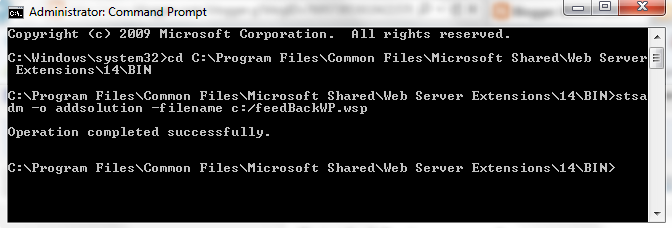
Once you add all your code, compile and deploy your solution to SharePoint site.
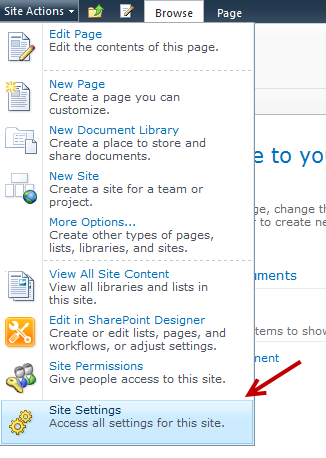
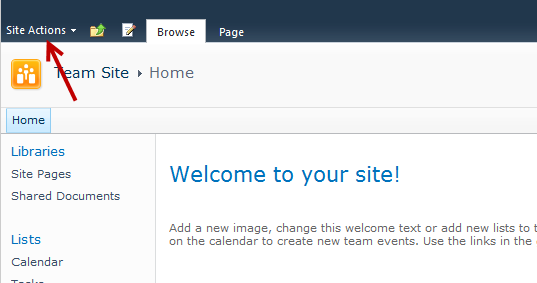
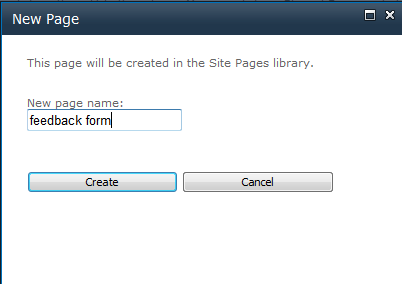
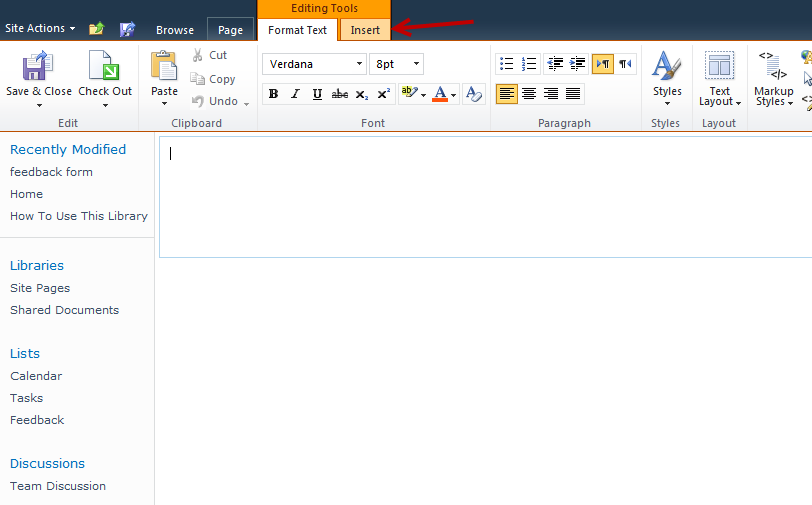
Now go to your site page and edit to add the web parts. Once you add your web parts and connected your web parts as shown below, it is time for testing. (Or you can add a new Webparts page)
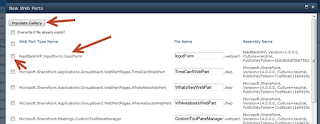
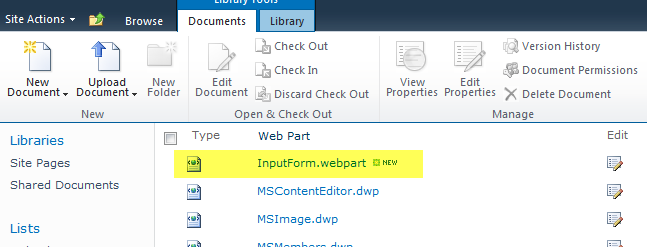
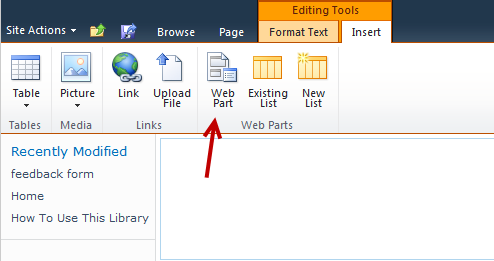
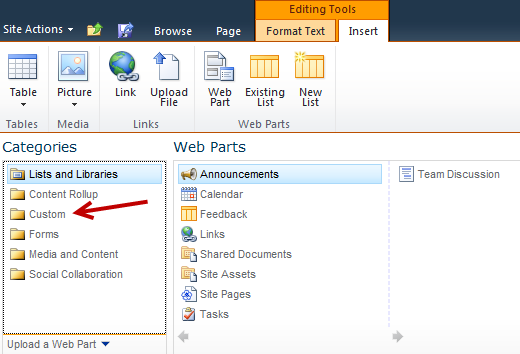
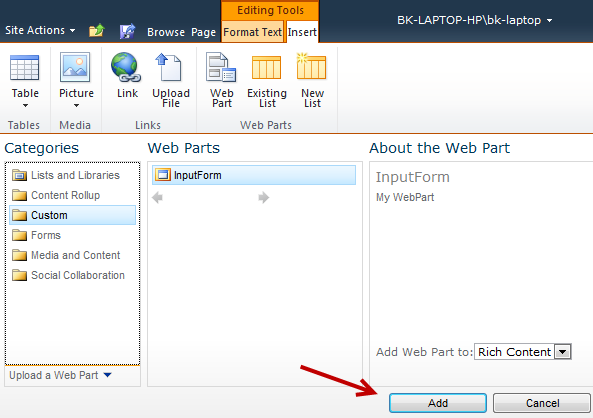
Two new Webparts will appear in your custom section when you click Add Webpart: Place them on the page as shown below: When you have both of the Webparts on the Webparts page, click on the dropdown on the CategoryResultsWP and select connection. Get category results from, CategoryNavigationWP and the connection will be established. Now you can select from the dropdown and get the results that you would expect. (See screenshots below)
CategoryNavigationWP
add-navigation-webpart
CategoryResultsWP
add-results-webpart
webpart-saveclose
When you are done, you will end up with 2 webparts on a webparts page that will communicate with each other as you make click on the dropdowns. You can have as many webparts as you want on a webparts page that communicate with each other, as long as you implement the correct interfaces- as this article explains.
webpart-communication
multiple-webpart-communication
Step 6: Adding code-behind in Visual Web Parts to handle post back properly.
There are a couple of points to note when you are trying to use connected web parts with Post back.
  • It is always better to call “EnsureChildControls” in Web part OnInit overload method. OnInit method will make sure your view state is loaded at time of control initialization.
  • Call your user control method during the OnPreRender method overload. When you have complex controls or multiple controls to load, it is always better to call during the Pre Render instead of Render Contents method.
Summary:
Congratulation, you’re on your way to creating a framework for your next Enterprise SharePoint rollout which will enable you to connect to all of your web parts on a typical web parts page.
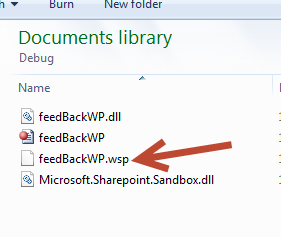
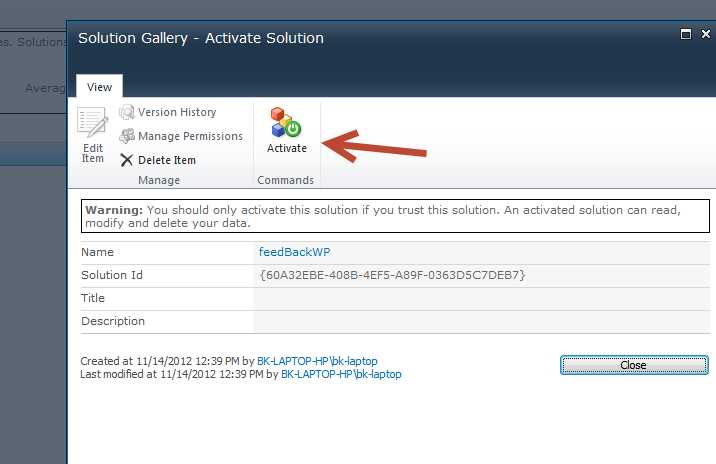
The entire source code of this article can be downloaded over here
Note: After downloading the source code, when you open the VS 2010 project, you must set the SharePoint URL as shown below- right mouse click on ConnectedWebParts and select properties:
set-sharepoint-url

Reference:

http://www.dotnetcurry.com/showarticle.aspx?ID=678

SharePoint 2010 - Connected Web Parts


In this article we can explore Connected Web Parts which is an advanced SharePoint Web Part feature. The connected web parts denote communication between 2 web parts.

CntWbShare1.jpg

The connected web part resolves the following requirements:

  • Master Web Part and Slave web part data exchange
  • Data Selection and Data Display web part communication
Summary of the application is:
  • There are 2 web parts
  • Web Part 1 has a drop down list for selecting Car
  • Web Part 2 displays the car picture based on selection
Steps Involved

Following are the steps involved in creating connected web parts:

  1. Create Project
  2. Create Communication Interface
  3. Create Web Part 1 (Provider) implementing Interface
  4. Create Web Part 2 (Consumer)
  5. Build and Deploy
Create Project

We can experiment with a Car showcase application where there are 2 web parts.

  • The first web part allows selecting a Car from the drop down list.
  • The second web part displays the image of the car.
to begin, create a new Web Part project in Visual Studio.

CntWbShare2.jpg

Remove the default VisualWebPart1 web part. We will be adding our own web parts.

Create Interface

For communication between the 2 web parts we need to create an interface. Please create the following interface, which returns the selected Car name:
public interface ICar{
    string Car { get; }
}


Create Provider Web Part implementing Interface

Now you can create a new web part named CarSelectionWebPart. Expand the webpart item and in the User Control (CarSelectionWebPartUserControl.ascx) class file:

  1. Add a drop down list control
  2. Place the following code
public partial class CarSelectionWebPartUserControl : UserControl{
    protected void Page_Load(object sender, EventArgs e)

    {
        if (!this.IsPostBack)
        {
            DropDownList1.Items.Clear();
            DropDownList1.Items.Add("Camry");
            DropDownList1.Items.Add("Figo");
            DropDownList1.Items.Add("Diablo");
        }
    }
    // Property to expose selected car outside    public string Car
    {
        get;
        set;
    }
    // Set the Car property    protected void Button1_Click(object sender, EventArgs e)
    {
        if (DropDownList1.SelectedItem != null)
            Car = DropDownList1.SelectedItem.Text;
    }
}


In the CarSelectionWebPart.cs (web part class file) add the following code:
 
// Property to return the selected Car
public string Car
{
    get
    {
        return (_control as CarSelectionWebPartUserControl).Car;
    }
}

// Special Purpose Attribute to denote ICar interface is provided
[ConnectionProvider("Car")]
public ICar GetCar()
{
    return this;
}
The ConnectionProvider attribute and the interface of the method denotes that this web part provides data for ICar interface. The Connection Provider also says that the name is Car (in string).

Create Consumer Web Part

Now we can create the consumer web part which will get the selected Car to display the car picture. Add a new web part and name it CarDisplayWebPart. Place an image control on the user control of the web part. In the class view of the user control add the following method:
 
// Set the image to url
public void SetImage(string car)
{
    if (car == "Camry")
        Image1.ImageUrl = "/_layouts/images/ConnectedWebParts/Camry.png";

    else if (car == "Figo")
        Image1.ImageUrl = "/_layouts/images/ConnectedWebParts/Figo.png";
           
    else if (car == "Diablo")
        Image1.ImageUrl = "/_layouts/images/ConnectedWebParts/Diablo.png";
}

Now add Images Mapped Folder and place 3 image files (Camry.png, Figo.png, Diablo.png) in the folder as shown below:

CntWbShare3.jpg

Build and Deploy

Now build the project and use the Deploy command. Open the SharePoint site in edit mode and add the above 2 web parts into it. You are now ready with the following 2 web parts.

CntWbShare4.jpg

Set Connection

Use the context menu of CarDisplayWebPart to set the connection to provider web part.

CntWbShare5.jpg

Testing the Web Parts

Now stop editing the web page and refresh the site. Select a car from the first web part and the car picture is displayed on the second web part.

CntWbShare6.jpg

This concludes our article on Connected Web Parts creation.

Debugging the Web Parts

You can debug the application, by executing the project in Debug mode. Any break points set will be executed.

CntWbShare7.jpg

References
http://msdn.microsoft.com/en-us/library/ms469765.aspx
http://rtmgroupq8.com/en/add-image-to-sharepoint-visual-web-part

Summary

In this article we have explored the Connected Web Parts feature of SharePoint Web Parts. In real-world scenarios there could be multiple web parts communicating with each other through connected web parts. SharePoint also supports AJAX enabled web parts which provide a better communication between web parts. The attachment contains the source code of the web parts we discussed.


Reference:

http://www.c-sharpcorner.com/UploadFile/40e97e/sharepoint-2010-connected-web-parts/


Excellent Article by Raza Fayyaz

When you are done developing a WebPart, you need to deploy it to the SharePoint server. However, depending on your server setup, you may have to use specific deployment methodology and that is why it is important to know your options. This post describes different ways to achieve this goal.


Basic understanding

Whatever method you use to develop your WebPart, you will always end up with a WebPart DLL and in some cases you will have WSP file (both of these files are in debug folder of your project). It is the DLL file that plays a key role in getting your WebPart inside SharePoint server.

Ways to deploy a WebPart

There are four ways we can deploy a WebPart on SharePoint server that I will cover in this post:

  1. Using Visual Studio to deploy the solution
  2. Manually moving the DLL to the server
  3. Uploading WSP to SharePoint server
  4. Deploying through command prompt 

https://blogger.googleusercontent.com/img/b/R29vZ2xl/AVvXsEg0ccDIal1fgre4ykvZMOXNS1WXQdrjLaVqqOV7BqRiZFjXaH5G9cYk5iHCmKJ-A6lHj2DWLtFgI7tZPnncrSm8HrFCJWbX0tK7vUK-HWoj-1DfgSIN6e2jYdPbQT7tT4xyialwC2hgpZw/s1600/11-14-2012+12-58-15+PM.png


Pre-Requisites

I am assuming that you are all done with the development and are now ready to deploy. In these examples I have a project name "FeedbackWP" that I need to deploy.

Deploying through Visual Studio

Once the coding is complete, click on build > deploy


In the output window you should see the deployment success status.


 https://blogger.googleusercontent.com/img/b/R29vZ2xl/AVvXsEhU1kOi_8LLQQw64jM90_QWA_bkFCSOXgOxbMcK7baszTbEPPBenBVBCOUUnD4zM_KCI9HYgZeu6G5eciKL9pgNcHTaHKl3a7Aa_khnzgamxC_sus6OrtlMt8mkB-jadQjnYOP7mXOMuhs/s1600/dep01.png


 For next steps please look at "After you webpart is deployed" section at the end of this post.


 Deploying by manually moving the DLL


Build the solution


 https://blogger.googleusercontent.com/img/b/R29vZ2xl/AVvXsEiuRXWkqGI3ft9lJAWBjY8nPHIKQkwHifgrz0ZZ1XqUJNVIr4kQlvT06zv1sbh6EP4_0ReK3Vd6UQb_W3XSVhNaiZXkM2mlq5LFFt7ohzMfmMwA071XHEg7OzaArNKt1O52e2wZYB62r3M/s1600/11-13-2012+8-31-04+PM.png


 If no error returned by the compiler, copy the DLL from your project bin > Debug directory to the bin directory of your WSS site (C:\Inetpub\wwwroot\wss\VirtualDirectories\80\bin).


Go to (C:\inetpub\wwwroot\wss\VirtualDirectories\80\) and modify the Web.Config file for the WSS site to declare the custom web part as a safe control by adding the following code within the <SafeControls> tag.

<SafeControl Assembly="DLL-Name-Here" Namespace="DLL-Name . NameSpaceHere" TypeName="*" Safe="True" />

In my case my dll name is feedBackWP and the namespace of my webpart is InputForm; so my SafeControl entry looks like:

<SafeControl Assembly="feedBackWP" Namespace="feedBackWP.InputForm" TypeName="*" Safe="True" />

And my webconfig looks like the image below:

https://blogger.googleusercontent.com/img/b/R29vZ2xl/AVvXsEhz-XueOugC5nYWi082PRUi-d7bF8-CiciXa-yIte2QJd565F0at5lpiW8rXMWWuMJbvcGeE1f3VYm_40_fvVCudRYuN-JE2MUQB4ahA245OqZQSVH6Sg2SF9AS3YGXbWRDKSaAKd0SbtY/s1600/11-13-2012+9-09-33+PM.png


 Now we need to add this webpart to our Sharepoint gallery.

Click on Site Actions -> Site Settings -> Web Parts.


 https://blogger.googleusercontent.com/img/b/R29vZ2xl/AVvXsEgVNg6eOpHHJD0MMfBTnA2RN1qJc5-67Nu5JriXOL-uZnKGVtOl-9uDE5WQj1MCR_sdbgml_k5x_5dujz7fq8gsyQH-d9Is1Nnljs-0bFUQi32b7dTEGkWrUYgUOA0sIo7E1USjGGSs9Vc/s1600/11-13-2012+9-11-59+PM.png


 From Web Parts page click on Documents > New Document


https://blogger.googleusercontent.com/img/b/R29vZ2xl/AVvXsEjts932n3x1LzTEXE4a7AgabrrWA5CsCp5SKnX3N9oG2A92rtj5ybvH-nO-P_DOL52JfsQ7BmH-N-aKN8YAeEEoQ22atS3gnqftZp98jE_QfGBW5MPYyTG-e3FwXIHEL2GqdX6dOacc1Cw/s1600/11-13-2012+9-12-51+PM.png


https://blogger.googleusercontent.com/img/b/R29vZ2xl/AVvXsEjppTutqs2Xm1qJYlKwVuQhULKTRybFY2qTy62_WP4EsArQXgzIcS8bOmMR2fJzcQEUPlM5etHZfFM33qITHAX8cHru4k64kT0bgRdt9BUGLfCKTIJQsZPVXrXzm-sHhbjrA2SDIrQPQ10/s1600/11-13-2012+9-13-30+PM.png


New Document will bring up a pop-up window. This window should have your new web part listed. Select your webpart from the list and click on Populate Gallery.


If the import is successful, you will see the web part in Web part gallery list.


https://blogger.googleusercontent.com/img/b/R29vZ2xl/AVvXsEiI9xEQ1k85pn_aGgsoLsQyF9nGeP_6o9rITt8uEktNb2ETkfdQeu_-f2araW2r3doWZfLZdajPI-SN_Xk02irqc4ZR1-FyOUhr86ERsXtcE8d0XpQ9M5uX6yQ0pRcKA0K4vlhG6xb9pYU/s1600/11-13-2012+9-14-46+PM.png


 For next steps please look at "After you webpart is deployed" section at the end of this post.


Deploying by uploading WSP to SharePoint server

Build the solution


https://blogger.googleusercontent.com/img/b/R29vZ2xl/AVvXsEiuRXWkqGI3ft9lJAWBjY8nPHIKQkwHifgrz0ZZ1XqUJNVIr4kQlvT06zv1sbh6EP4_0ReK3Vd6UQb_W3XSVhNaiZXkM2mlq5LFFt7ohzMfmMwA071XHEg7OzaArNKt1O52e2wZYB62r3M/s1600/11-13-2012+8-31-04+PM.png


 If no error returned by the compiler, you will have WSP file in your project bin > Debug.


  Open Sharepoint and click on Site Actions -> Site Settings -> solutions.

 https://blogger.googleusercontent.com/img/b/R29vZ2xl/AVvXsEhYKjWMz9Alzas8YbFL8BPn4cj-eqromdp6V_03EiQXqFkJsP73Po4PtaTllbQrXft5mw65aSaqZUZqQUurWONmiNteiDV7EmqkE1vGSRM6gJIvx0DJlkiuOnmWkJO846I-8xDbwkwCGqU/s1600/11-13-2012+9-11-27+PM.png


 https://blogger.googleusercontent.com/img/b/R29vZ2xl/AVvXsEhlIOl7f2ry3sqUV06bsh5uOmkxVk8j_iQVi9seixomoWkTXX-XHc0bkSMMhnaMb-VOriQtJ8RJtib-G5jRQd4BbYvq17YtRfdbPVWUFHjc0OTOngXD7vMHpc8g7_tVZXkvFD-g6u1fQgc/s1600/11-14-2012+12-34-53+PM.png


 From solutions page click on solutions on top and after clicking it, you should see upload solution tab.


 https://blogger.googleusercontent.com/img/b/R29vZ2xl/AVvXsEj-Im9_PimlFqwRbZ78RYraGbdQqZ73kDTMObprHfUQTPxGr1s3LeGlBvoZ5kBjxcPBBwtzDZC_MgqyLsnzrruEBdRUKhRi8RppK8Zlfi1iJ1Yai3MhWvPVQg2PCqskiTOi3DZtWEgEYdc/s1600/11-14-2012+12-37-05+PM.png


 https://blogger.googleusercontent.com/img/b/R29vZ2xl/AVvXsEgHxIGIFe5eEiUasRrgjDxw_7g-89y9UMcB2Gga7pRV3OSsnrdyZ4Bw9Yuple84mtVqNAPFR0cCEeBqZR8C5kHg0EIgDLogUxCv7RkCaroBzw7VEPEaBt0orjBne2k6wRnhHNCxrdxhzMs/s1600/11-14-2012+12-37-19+PM.png
 Click on upload solution and it will bring up a popoup to upload your webpart.


 https://blogger.googleusercontent.com/img/b/R29vZ2xl/AVvXsEgaM_2rCafR-tFC3tqV69gdJXPakrObE6LRHmGc1ptwQ5ENX_1PyTWWIIr94JQTQMRJHp5FeCKmPPHyA_f_0h6NwVt2W9J8RO4mmT7ymrLUUfNpY9L92rqtG1IW1jVYoeNXYi3UpzIRtVE/s1600/11-14-2012+12-38-34+PM.png


 Upload your WSP file.


 https://blogger.googleusercontent.com/img/b/R29vZ2xl/AVvXsEiZK-HfUjNrgKMNJIz-irFIQJcWUF30RtpOwbOUqJSnF5FYbbzT6IfDDAhSv7X9jzo_ScUlptybyh7RJQJbqDZ132v3GPOyyfvzV2vbhg3Z0ZqSm2CQ0MV3F3bjuASULKQYzxsP1jAFXbc/s1600/11-14-2012+12-39-22+PM.png


 If uploading is successfull, you should see the webpart appear in the solutions list.


 https://blogger.googleusercontent.com/img/b/R29vZ2xl/AVvXsEiqKSRXrthHziYMs3HTcXijFXK_r0hYVHYhZZa_iXkc8JX393HScH-SIeNK9INenWTqtaujIArj6uJHlYtTn0G2P1cOqBt4JK8V7POWq9PEoagUidOAJH43uYaupMlAqPiDTIm4Ticzfdk/s1600/11-14-2012+12-39-51+PM.png


Activate the solution and thats it.


 https://blogger.googleusercontent.com/img/b/R29vZ2xl/AVvXsEjNoQhlCEChHwpze_6H5N948d5lbIZixkdgQp4QJrMzzQk0KGajqwy9TqJ5_l7-8pNuEzr8vUk0RODQhOJAGnUhTswZNWRYpnCAfvSw3FLBajv0Vm1XC8F1GfX58Hv5TtEx-HDtLZtugM0/s1600/11-14-2012+12-40-47+PM.png


https://blogger.googleusercontent.com/img/b/R29vZ2xl/AVvXsEgVTqT6uOX57TH-ruazCdFYN18brVL32R6kUmPIVvtA50YA0w2-_01J1CTc4b6V6towybR4VLyH1LX6maKAhC0hSreMOBe8w_4Zyb8YZygePNYqBbpVXo6E7nwBRClZo1oBQhPKE_Rd4JU/s1600/11-14-2012+12-41-07+PM.png


 For next steps please look at "After you webpart is deployed" section at the end of this post.


Deploying through command prompt

Build the solution


https://blogger.googleusercontent.com/img/b/R29vZ2xl/AVvXsEiuRXWkqGI3ft9lJAWBjY8nPHIKQkwHifgrz0ZZ1XqUJNVIr4kQlvT06zv1sbh6EP4_0ReK3Vd6UQb_W3XSVhNaiZXkM2mlq5LFFt7ohzMfmMwA071XHEg7OzaArNKt1O52e2wZYB62r3M/s1600/11-13-2012+8-31-04+PM.png


 If no error returned by the compiler, you will have WSP file in your project bin > Debug.


Copy the wsp file on the server and open up a command line and navigate to the 12-hive bin folder.
(my 12-hive bin folder is C:\Program Files\Common Files\Microsoft Shared\Web Server Extensions\14\BIN)


 https://blogger.googleusercontent.com/img/b/R29vZ2xl/AVvXsEhkKIJVpGWqfcKPkwnww6oAuMT9zAht8EPPB21JHhCPooO7CJkxeeutthBefUGWkoVc109RZ5jUsKYWVXr9IuCDGnm2au1i7vXv5GVL20HtrDCwRqS7puWziBcWfbtgQ14RKTlObNr5Krk/s1600/11-14-2012+1-29-26+PM.png


 Enter the following commands :

stsadm -o addsolution -filename WSP FILE NAME WITH LOCATION

stsadm -o deploysolution -name WSP FILE NAME -immediate -allowGacDeployment -url  SITEURL  


So in my case these commands become:

stsadm -o addsolution -filename c:/feedBackWP.wsp

stsadm -o deploysolution -name feedBackWP.wsp -immediate -allowGacDeployment -url ht
tp://bk-laptop-hp/


 https://blogger.googleusercontent.com/img/b/R29vZ2xl/AVvXsEgj4RCGHxn8IcmEYXxYzBeA6jVK5WoYhbdBvbKZ_NYi6jLCiXYM7JFkAtlUQTJqYq3RF6XQPfO6bPWDXE5mtTLP_bnvOl5KSQOQgmlPHvwWOuGgRPu2R43eAt_9AHMXybwpc6VLddtpswM/s1600/11-14-2012+1-31-07+PM.png


 For next steps please look at "After you webpart is deployed" section.

After your Webpart is deployed

Go to the SharePoint site and click on Site Action > New Page.

 https://blogger.googleusercontent.com/img/b/R29vZ2xl/AVvXsEjkoWtU_Qut8y7ZxzPgfZuWLyykeADXA5RwlBqhcKp1Fh01Bc8eU6jJiLCmidd-6CEYUqb3FVemJbGcW-2ToVlj_1aY4ipSIZ4m4q4AjkxCcViQ9rZvV88jnp3JdX1idZZeWqkgGrjw0VA/s1600/dep1.png


 https://blogger.googleusercontent.com/img/b/R29vZ2xl/AVvXsEiM5OqoSrd_bSDbqZouMlVDuQNn14lGY3mBGcVaWWJ1b8fYM7u9cr9OxbdW4SLh6gBhozjx7VBoXrKvhULQwTSgFHNKXjuSlbVD_W2-CqKQWF5p1xWFdV9zMGzUjxbMiseJMYNANuwE_KU/s1600/dep2.png


 https://blogger.googleusercontent.com/img/b/R29vZ2xl/AVvXsEh6FkJGAqQfpWxW_hFxd5Ixf76wfTKdlKsLmBOlzK1D14VvSmdGThmCvvCmUNLq49hxKraEMNUncTGEODjGhfhyphenhyphenykoUpXIBBZSLtL48L4wqiBkmMsEAQkztBbnzRRTLtg3_qYWcrR3u3a8/s1600/dep3.png


 From new page click on Insert and then on WebPart.

 https://blogger.googleusercontent.com/img/b/R29vZ2xl/AVvXsEggncujQhkrmpi3tC0l5osa__HnDMZWbf0rQN7U8gyJmC3hIg80t_Nb-00hiPIwRu1uQLDgTOjeOUvuLLFeDfNVEQv7PkSf3QtwRmbEbPWOyHBs__6Fbwgcp7uJtZ-Kw3Prq-D4ag3aUr8/s1600/dep4.png


 https://blogger.googleusercontent.com/img/b/R29vZ2xl/AVvXsEhnP8ghhjK_NuXQp5HB3U0qaoV46MRK1WkFgM5MmBEDnqkvxWI9NYUzuPz0CRUVfX5auhVv94j2TbTvndAC3sLViKKbPWeg6T8xa5RUQyReeOfXdO0lomy0faNDmFDT1ObL08EelxPv9-U/s1600/dep5.png


 From WebPart list click on custom (NOTE: In some cases this is miscellaneous instead of custom). This should bring up our WebPart on the right hand side.


 https://blogger.googleusercontent.com/img/b/R29vZ2xl/AVvXsEgrRENqNJJ9Y0wN8GXlegHcAH-k5CvTy5hjTtG2OURZLLzzNA6z_gezH-DC9E-nFOd1iyP3RuLNzb_y9vjIp-31qW4iGvzWMMLuoyP3YJpERsb9b1nFD0QjNyvkJDVVpI5PFvg0818PPSE/s1600/dep6.png


 With the WebPart selected click on the add button.


 https://blogger.googleusercontent.com/img/b/R29vZ2xl/AVvXsEirTtLohiGa61-GFiKdfbGIh6fzc8qpdVNkjUiYhr8JqKkNavZtWiwlkaPmkTXjVicUhYNPqZGN1RWsEZhaHYiy0jusEaPKUD9aNJQftrimPWGr5tD5mXOSqek_uKj5Cmb9LyRWz8Vd9kE/s1600/dep8.png


Reference:

http://www.razafayyaz.com/2012/11/different-ways-to-deploy-webpart-on.html