- Prep Work
- Active Directory Users in Play
- The Service Account I am selecting as the Impersonated User (Credential Owner)
- The Security Group where all the people that will consume BCS Data will reside
- SQL Server Security
- Who has Access to What
- Active Directory Users in Play
- Setup
- Creating & Configuring the Secure Store Object
- Creating & Configuring the External Content Type in SharePoint Designer 2010
- Creating External Connection with Secure Store
- Creating the External Content Type
- Reviewing the External Content Type (ECT)
- Reviewing the Security on the ECT
- Test & Validation
- Creating an External List derived from the ECT
- Logging on as a User from the Security Group AND Secured in the permission setting of the ECT
- Logging on as a User from the Security Group NOT Secured in the permission setting of the ECT
Part 1: Setup

Above: This represents the AD Account [appBCSUser] which I will use as the Impersonated User i.e. the Broker if you will that will connect to the LOB system on behalf of the Group of people who should have access to the data but DOES NOT have access to the database. This is something your DBA will love because he doesn’t have a flurry of people having accounts on his/her DB.

Above: This represents the AD Security Group [SecureStoreBCSUsers] that have access or should have access to LOB Systems. You can of-course have multiple of these for any number of LOB Systems. Note here that Fabian and Hardeep are in this list, we will be the test users later on.

Above: Lets look into CA now and set up our environment

Above: Click Applications Management then Manage Service Applications

Above: We are interested in the Secure Store Service so we click it

Above: We already have some there from previous Labs, but we will create a new one… click New

Above: We create a Target Application ID [note this cant be changed once committed], Display Name which can be the Same App ID, and so on.

Above: I populate the fields and choose “Group” as my Target Application Type. MSDN has a good explanation as to why you want to do that over other options. the Long and Short is that it allows me in this example to tie an AD Group FabianLabSecureStoreBCSUsers to a single set of credentials i.e. the FabianLabappBCSUser account. Ill show a few other options below

Above: By default it wants to know how you will collect the credential of the Impersonated User in my case it is a Windows Account so this works.

Above: I change it around a bit for kicks by adding the word Testing infront of the default text

Above: Here are a few other options that you can use. SSS is a Claims Aware SSO solution and can take in just about any Authentication Mechanism

Above: So here because I only log on to CA with the Farm Admin Account, I set that as the target App Admin, however here is where we start to make the App Work for our design. In Members, you can see that i have my AD Group Account earlier. This means that I dont have to meddle with the SSS App anymore, just add and subtract from the AD Security Group.

Above: It processes once i click OK

Above: Now i have a NEW SSS App, but wait you may ask… what about the Impersonated User.. we are coming to that…

Above: We click on the custom actions available and select SET CREDENTIALS to set the Mapping for the Impersonated Users to the Group that we will Manage of “Allowed Users”…

Above: Our trusty Silverlight App shows the progress of us opening a Dialog Pane

Above: The default look of the Credential Mapping

Above: I populated the values with my User Account previously mentioned in the AD Step
Part 2: Validation and Testing
![clip_image001[4]](http://fabiangwilliams.files.wordpress.com/2010/04/clip_image0014.png "clip_image001[4]")
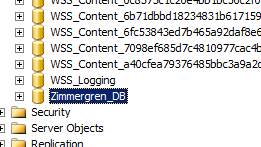
Above: So in SQL Sever you can clearly see that the only account that has Access to the Database “FabianPlayPen” is the AD User mentioned above right…
![clip_image002[4]](http://fabiangwilliams.files.wordpress.com/2010/04/clip_image0024.png "clip_image002[4]")
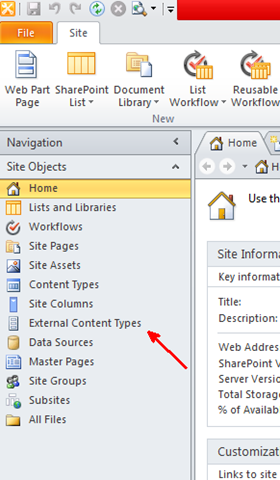
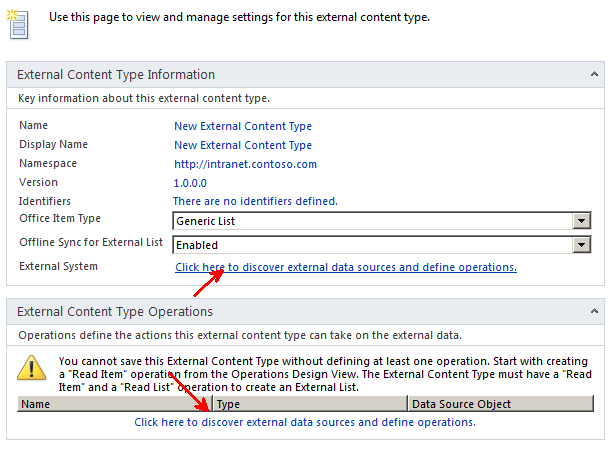
Above: We create a new External Content Type by defining the name and Selecting External system to define our Connectivity
![clip_image003[4]](http://fabiangwilliams.files.wordpress.com/2010/04/clip_image0034.png "clip_image003[4]")
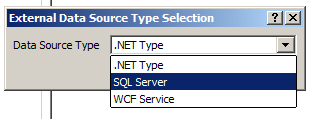
Above: We choose SQL from the list of choices
![clip_image004[4]](http://fabiangwilliams.files.wordpress.com/2010/04/clip_image0044.png "clip_image004[4]")
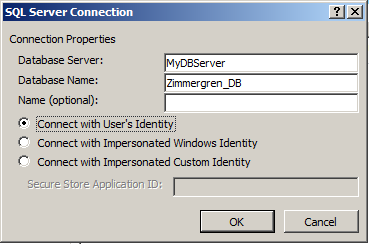
Above: We define our SSO connection. One note here though in full disclosure, I had tried a few times to make this work and did a typo, so I re-did my SSS App and called it FabianLABSSSMSDNForumQ from what i had it last but the steps are the same.
![clip_image005[4]](http://fabiangwilliams.files.wordpress.com/2010/04/clip_image0054.png "clip_image005[4]")
Above: Here you may or may not get challenged for credentials when you click OK. The credentials you put here are or should be your own; assuming that you are in that Security Group that will be mapped to the Impersonated User. If not, then you need an account in that Security Group List.
![clip_image006[4]](http://fabiangwilliams.files.wordpress.com/2010/04/clip_image0064.png "clip_image006[4]")
Above: Once completed you will be able to connect to your LOB System, expand it and perform any operation allowable to you
![clip_image007[4]](http://fabiangwilliams.files.wordpress.com/2010/04/clip_image0074.png "clip_image007[4]")
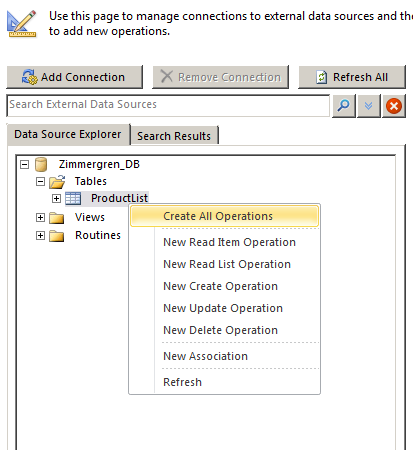
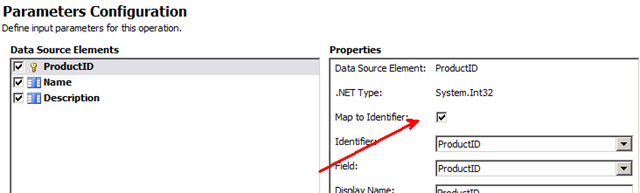
Above: In our instance lets just create a FULL CRUD operation
![clip_image008[4]](http://fabiangwilliams.files.wordpress.com/2010/04/clip_image0084.png "clip_image008[4]")
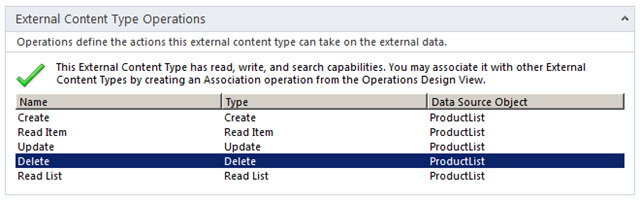
Above: Validation that it is complete
![clip_image009[4]](http://fabiangwilliams.files.wordpress.com/2010/04/clip_image0094.png "clip_image009[4]")
Above: Click the “Save” button to push the ECT up to the BDC Metadata Store.
![clip_image010[4]](http://fabiangwilliams.files.wordpress.com/2010/04/clip_image0104.png "clip_image010[4]")
Above: Now we can check a place where alot of Gotchas happen. Now one may assume that because they have access to the LOB system via the impersonated user and Group Mapping you are done… You’d be wrong, now you NEED to have permission to use the ECT and I already have mine set up by default under “Set Store Permission” to add myself, the search account, and my service account by default. You may need to put your security group here to make it seamless, but because i am doing demos and want it to break depending on my use case, i leave it fluid.
![clip_image011[4]](http://fabiangwilliams.files.wordpress.com/2010/04/clip_image0114.png "clip_image011[4]")
Above: to do that, click the custom actions and select “Set Permissions”
![clip_image012[4]](http://fabiangwilliams.files.wordpress.com/2010/04/clip_image0124.png "clip_image012[4]")
Above: Do your business here by adding the users you want to have access. Here note that Hardeep doesnt have access while he IS a member of the Security Group.
![clip_image013[4]](http://fabiangwilliams.files.wordpress.com/2010/04/clip_image0134.png "clip_image013[4]")
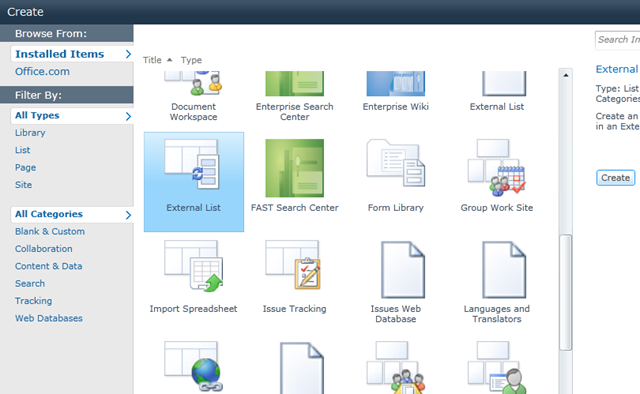
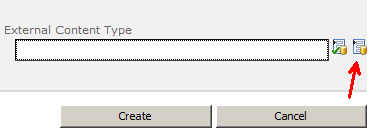
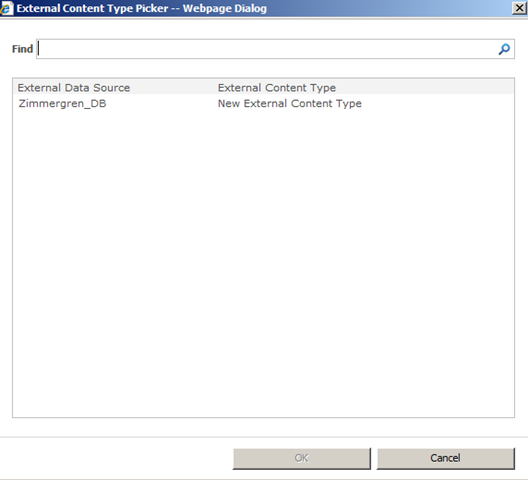
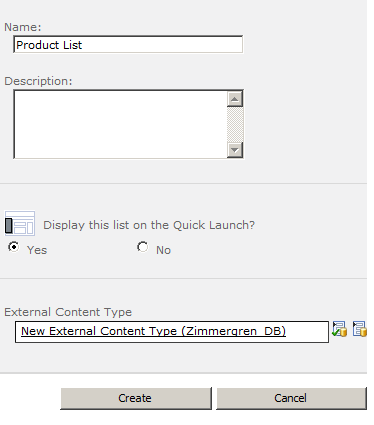
Above: Once done, now we can create our External List by choosing our ETC recently created.
![clip_image014[4]](http://fabiangwilliams.files.wordpress.com/2010/04/clip_image0144.png "clip_image014[4]")
Above: Commit to the System and cross your fingers…. Voilla!
Part 3: UAT
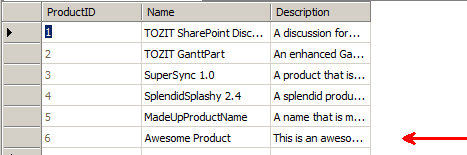
![clip_image015[4]](http://fabiangwilliams.files.wordpress.com/2010/04/clip_image0154.png "clip_image015[4]")
Above: Logged on as Me…
![clip_image016[4]](http://fabiangwilliams.files.wordpress.com/2010/04/clip_image0164.png "clip_image016[4]")
Reference