Sunday, 21 December 2014
How to Create a Page Layout (PageLayout) with ContentType in SharePoint 2013
Reference:
How
to Create a Page Layout (PageLayout) with ContentType in SharePoint
2013 - See more at:
http://www.sharepointpals.com/post/How-to-Create-a-Page-Layout-(PageLayout)-with-ContentType-in-SharePoint-2013#sthash.9sF7Iimh.dpuf
Creating a Page Layout in SharePoint 2010 using Visual Studio 2010
Creating
a custom Page Layout in SharePoint 2010 is not too different than
creating a custom Page Layout in SharePoint 2007. However, the process
of creating a SharePoint Solution Package has changed in Visual Studio
2010. This article will walk you through the steps.
First, open
Visual Studio and create a new C# project, using the "Empty SharePoint
Project" template, listed under the SharePoint 2010 project templates.
For this example, we'll name our project "MyCustomPageLayout".

For this example, we'll be deploying our solution as a "Sandboxed solution".

Click "Finish" to wire up your solution to your particular SharePoint site.
As with
SharePoint 2007, we'll need to provision our Page Layouts to our
SharePoint Site Collection Master Page Gallery by using a "Module"
element. To do this, right click on the Project and say you want to add a
new item. Select "Module" from the list of SharePoint 2010 items.

We'll name the Module "masterpage". When you create the new module, you'll see something like this:

By default,
the module contains a sample text file you, so you can see how the
Module deploys a file to SharePoint. However, we don't need it, so we'll
delete Sample.txt. Next, we need to wire up our module to point to the
URL of the Master Page Gallery, so we'll add a "Url" attribute to the
Module node. Our Elements.xml file should now contain this XML:
<?xml version="1.0" encoding="utf-8"?>
<Elements xmlns="http://schemas.microsoft.com/sharepoint/">
<Module Name="masterpage" Url="_catalogs/masterpage">
</Module>
</Elements>
<Elements xmlns="http://schemas.microsoft.com/sharepoint/">
<Module Name="masterpage" Url="_catalogs/masterpage">
</Module>
</Elements>
Next, we're
going to dop our new Page Layout file into the Module. To do thhis,
we'll right-click on the "masterpage" module in the Visual Studio
explorer and select "Add new item". We're once again presented with the
"Add New Item" dialog. If we were to select "Application Page" from the
SharePoint 2010 menu, we'd get a code-behind page in addition to our
ASPX page, which we don't want. Since all we want to provision is markup
(and not code), we're going to use a shortcut. Select the "General"
node and select "Text File" from the list of items. However, name the
file "MyCustomPageLayout.aspx".

Add your Page
Layout markup into your MyCustomPageLayout.aspx page. You can do it how
I do it, which is to create a new Page Layout in SharePoint designer,
then copying the code to Visual Studio. However, DO NOT FORGET to remove
the attributes in the Page Directive at the top of the page that
SharePoint Designer adds, that look like this:
meta:webpartpageexpansion="full" meta:progid="SharePoint.WebPartPage.Document"
If you don't
forget to remove those items from the Page directive, SharePoint will
think your pages have been customized, even though they were deployed
via a Feature.
Next, we'll need to update the Module's Elements.xml file to tell SharePoint what to do with the new Page Layout.
The first
thing we'll need to do is to update the "Url" property of the File
element, by removing the "masterpage/" prefix fromt the Url. (Since we
already specified in the Module element that we're deploying the Page
Layout to the "masterpages" library, if we left the "masterpages/" part
of the Url on the file, SharePoint would try to provision our Page
Layout into a library called "masterpages" inside the existing "masterpages" library! We don't want that!) Your new File element should look like this:
<File Path="masterpage\MyCustomPageLayout.aspx" Url="MyCustomPageLayout.aspx" />
Now we need
to specify some properties for the Page Layout. These properties are
identical to the kind of properties you would specify for a Page Layout
in SharePoint 2007:
- The Title of the file in SharePoint
In our case, the file itself has a URL of MyCustomPageLayout.aspx, but we can also give the page a Title that will show up when the Page Layout is being selected by the content author, such as "My Custom Page Layout". - The Content Type
All Page Layouts must inherit from the "Page Layout" content type (which we add using a Resource file value.) - A Publishing Preview ImageThe Publishing Preview Image is the image that shows up when a user picks that Page Layout from the Page Layout picker while they're creating a new page. In this example, we'll just point to the Article Page's preview image.
- The Publishing Associated Content Type
This is the Content Type that the Page Layout is representing, such as an "Article Page", "Welcome Page", etc. The value is a string representing a Lookup value that's a combination of the name of the Content Type and its unique identifier.
<File Path="masterpage\MyCustomPageLayout.aspx" Url="MyCustomPageLayout.aspx" Type="GhostableInLibrary">
<Property Name="Title" Value="My Custom Page Layout" />
<Property Name="ContentType" Value="$Resources:cmscore,contenttype_pagelayout_name;" />
<Property Name="PublishingPreviewImage" Value="~SiteCollection/_catalogs/masterpage/$Resources:core,Culture;/Preview Images/CustomPageLayout.png, ~SiteCollection/_catalogs/masterpage/$Resources:core,Culture;/Preview Images/CustomPageLayout.png" />
<Property Name="PublishingAssociatedContentType" Value=";#$Resources:cmscore,contenttype_articlepage_name;;
#0x010100C568DB52D9D0A14D9B2FDCC96666E9F2007948130EC3DB064584E219954237AF3900242457EFB8B24247815D688C526CD44D;#"
/>
</File>
Please note, there's no line break inside the PublishingAssociatedContentType value string; I needed to add a line break so you could see the whole value here.
That's it! We've built our Module.
Now, we're going to add a module for the Page Layout preview image. Right click on the project and add an additional Module element. Delete the "Sample.txt" file from it, and add your new preview image. (In our case, we'll call it CustomPageLayout.png".) Modify your module file so it looks like this:
<Module Name="Previews Images" Url="_catalogs/masterpage/$Resources:core,Culture;/Preview Images">
<File Path="Preview Images\CustomPageLayout.png" Url="CustomPageLayout.png" Type="GhostableInLibrary">
<Property Name="Title" Value="Custom Page Layout Preview Image" />
</File>
</Module>
You might have noticed that a new Feature got created for you when
you created a new Module. Let's rename the Feature itself
MyCustomPageLayout in the project tree, like this:

We'll open up our MyCustomPageLayout feature, and give it a helpful
name and description. Notice that you can graphically see that your
Module is a part of this Feature, and you can even see which Module
files will be provisioned when the Feature is activated.

The last thing we need to do is to make sure our Solution Package is getting configured correctly, to include our new Feature.
By default, the "Empty SharePoint Project" will create a DLL for
you. If we just went ahead and deployed our Solution Package with the
settings as-is, we would be deploying a DLL to the GAC. However, since
our solution doesn't have any code in it, it would be a blank DLL.
That's a bit messy, so let's avoid that. Click on the Project in your
Solution Explorer, and look in the Properties Window. Change the
"Include Assembly in Package" property to "False".

Important note: This value is in the Properties Window. I
was originally looking for it in the Properties page of the Project (say
that three times fast), and I couldn't find it there.
To deploy our new Solution Package to our Sandboxed Site, we'll go
to the "Build" menu in Visual Studio, and select "Deploy
MyCustomPageLayout".

This will assemble the Solution Package, deploy the Solution Package to the Sandbox, then activate the Sandboxed feature.
If we browse to our Master Page Library, we'll now see our new Page
Layout. Note that, unlike SharePoint 2007, our Page Layout will appear
checked out by default, if we haven't modified any of the approval or
check-out settings of the out of the Master Page Gallery. We'll need to
check it in and approve it for it to be available to us.
This article was edited on 3/1/2010 based on reader feedback. The Type="GhostableInLibrary" attribute was added to the File node of the Page Layout, and a section explaining how to add a preview image was added.
Reference:
http://www.savtechsol.com/Education/BeckysBlog/Lists/Posts/Post.aspx?ID=68
Custom master page and page layout using visual studio
Excellent step by step article in
http://www.microsofttechnology.net/2012/02/custom-master-page-and-page-layout.html


 Then change v4.master to mstechsharingdotcom.master
 Continue, Mapping Images folder as follows
 Mapping Layout folder as follows

 After Mapping Folders, you see UI as follow


You see Hello word is appear


 Download All Resource: at here
Read more:
Reference:
http://www.microsofttechnology.net/2012/02/custom-master-page-and-page-layout.html
http://www.microsofttechnology.net/2012/02/custom-master-page-and-page-layout.html
This is Team Site, default have not "master page" link will be display in category Look and Feel
Active some features to "master page" link will be display in category Look and Feel
Active some features to "master page" link will be display in category Look and Feel
Go to Site Actions | Site Settings
At category "Site Collection Administration" click to " Site collection
features" link then find to " SharePoint Server Publishing
Infrastructure" feature and active it
Go to Site Actions | Site Settings
At category " Site Actions" click to " Manage site features" link then
find to " SharePoint Server Publishing" feature and active it
After active two feature you will see "master page" link will be display in category Look and Feel
Go to Site Actions | Site Settings
At category "Look and Feel" click to " Master page" then choose master page from dropdownlist

You will see user interface as follows:
Repair:
Deploy custom master page from v4.master
Open visual studio | New Project | choose Module template and provide name is mstechsharing.com
choose radio button "Deploy as a farm solution"
Change Module1 to MasterPage
Delete Sample.txt file in MasterPage module
Download default master page sharepoint (V4.master) from your web application or at here, then add new existing item to v4.master
Choose your v4.master
Open Element.xml file in MasterPage module and see Molule and File tag is configured as follows
Copy code Url="_catalogs/masterpage" RootWebOnly="TRUE" List="116" and paste to here

Delete Url MasterPage/
Copy Type="GhostableInLibrary" IgnoreIfAlreadyExists="TRUE" and paste to here
Mapping STYLES folder as follows

Choose STYLES Folder
Open mstechsharingdotcom.master and edit content below body tag
Deploy project
Go to Site Actions | Site Settings
At category "Look and Feel" click to " Master page" then choose master page from dropdownlist which it had deployed from visual

You see Hello word is appear
Design Html Page and copy resource (Image, css, js) to sharepoint folder (image 26)

In folder STYLES, create new folder mstechsharing.com
Copy image to Images | mstechsharing.com, .css to STYLES |
mstechsharing.com, .JS to Layouts | mstechsharing.com (if have) from
html package
Add new Style Sheet and provide name is mstechsharingdotcom.css then call mstechsharingdotcom.css to mstechsharingdotcom.master
Edit myMaster.master (mstechsharingdotcom.master) image 30
Change background
Call mstechsharingdotcom.css file above </head> tag
Open .css file in html package and copy code below
Open mstechsharingdotcom.css and paste that code to here
but you know body in normal html is different to body in sharepoint. So
you use fire bug in firefox and get div contain all contain (in
sharepoint 2010 that div have id= "s4-workspace")

Delete all code in mstechsharingdotcom.css and paste this code to here and change path in URL
body #s4-workspace {
background-attachment: fixed !important;
background-image: url("/_layouts/Images/mstechsharing.com/bg_body.jpg") !important;
background-position: center top !important;
background-repeat: no-repeat !important;
}
Deploy and set master page again (no require)
You see background is changed
Change width of body container. Using firebug and get that div tag with id "s4-bodyContainer"
copy this code and paste to mstechsharingdotcom.css file

Deploy project and hit F5 you will see width of body container is changed
Insert banner (image 39)
Using firebug and get where can insert banner. below div with class ="s4-title s4-lp" and above div have id="s4-topheader2"
Open mstechsharingdotcom.master and insert code html to here
<!--Insert banner-->
<div class="div-top-ban">
</div>
<!--End Insert banner-->

Paste this segment code to here
.div-top-ban {
height: 172px;
width: 980px;
background-image: url(/_layouts/Images/mstechsharing.com/top-ban.png);
background-repeat: no-repeat;
}
Deploy project
You see banner had inserted
Custom menu bar
download css at here and add existing item to STYLES | mstechsharing.com folder
at reference MenuBar.css to mstechsharingdotcom.master
Deploy project
You see menu had changed but you see have a block with width is not fix
Solve: Using firebug to get Block which it is not fix the width, it is div with id="s4-titlerow"
Paste segment code to here
#s4-titlerow
{
width:980px !important;
}
deploy project
UI is fixed as follow
Insert bottom (Image 50)
Using firebug to find where can insert bottom. insert below div with id="s4-mainarea"
Copy this segment code to mstechsharingdotcom.master (view in project)
Open mstechsharingdotcom.css and insert code css to here
deploy project
Now, you see UI have background, banner, top menu, bottom
Design page layout (image 55)
Download your Default PageLayout in sharepoint 2010 or download at here
Then add Existing Item... file DefaultLayout.aspx to MasterPage module
Rename DefaultLayout.aspx to mstechsharingLayout.aspx
Open mstechsharingLayout.aspx file and delete all and paste segment below to mstechsharingLayout.aspx file
<%@ Page language="C#" Inherits="Microsoft.SharePoint.Publishing.PublishingLayoutPage,Microsoft.SharePoint.Publishing,Version=14.0.0.0,Culture=neutral,PublicKeyToken=71e9bce111e9429c" meta:webpartpageexpansion="full" meta:progid="SharePoint.WebPartPage.Document" %>
<%@ Register Tagprefix="SharePoint" Namespace="Microsoft.SharePoint.WebControls" Assembly="Microsoft.SharePoint, Version=14.0.0.0, Culture=neutral, PublicKeyToken=71e9bce111e9429c" %> <%@ Register Tagprefix="Utilities" Namespace="Microsoft.SharePoint.Utilities" Assembly="Microsoft.SharePoint, Version=14.0.0.0, Culture=neutral, PublicKeyToken=71e9bce111e9429c" %> <%@ Register Tagprefix="WebPartPages" Namespace="Microsoft.SharePoint.WebPartPages" Assembly="Microsoft.SharePoint, Version=14.0.0.0, Culture=neutral, PublicKeyToken=71e9bce111e9429c" %> <%@ Register Tagprefix="OSRVWC" Namespace="Microsoft.Office.Server.WebControls" Assembly="Microsoft.Office.Server, Version=14.0.0.0, Culture=neutral, PublicKeyToken=71e9bce111e9429c" %> <%@ Register Tagprefix="OSRVUPWC" Namespace="Microsoft.Office.Server.WebControls" Assembly="Microsoft.Office.Server.UserProfiles, Version=14.0.0.0, Culture=neutral, PublicKeyToken=71e9bce111e9429c" %> <%@ Register Tagprefix="SPSWC" Namespace="Microsoft.SharePoint.Portal.WebControls" Assembly="Microsoft.SharePoint.Portal, Version=14.0.0.0, Culture=neutral, PublicKeyToken=71e9bce111e9429c" %> <%@ Register Tagprefix="SEARCHWC" Namespace="Microsoft.Office.Server.Search.WebControls" Assembly="Microsoft.Office.Server.Search, Version=14.0.0.0, Culture=neutral, PublicKeyToken=71e9bce111e9429c" %> <%@ Register Tagprefix="PublishingWebControls" Namespace="Microsoft.SharePoint.Publishing.WebControls" Assembly="Microsoft.SharePoint.Publishing, Version=14.0.0.0, Culture=neutral, PublicKeyToken=71e9bce111e9429c" %>
<asp:Content ContentPlaceHolderId="PlaceHolderAdditionalPageHead" runat="server">
<style type="text/css">
.page-title
{
display: none;
}
body #s4-leftpanel
{
width:0px;
height:0px;
display:none !important;
}
body .s4-ca
{
margin-left: 0px;
}
</style>
<SharePoint:CssRegistration name="<% $SPUrl:~sitecollection/Style Library/~language/Core Styles/page-layouts-21.css %>" runat="server"/>
<PublishingWebControls:EditModePanel runat="server" id="editmodestyles">
<!-- Styles for edit mode only-->
<SharePoint:CssRegistration name="<% $SPUrl:~sitecollection/Style Library/~language/Core Styles/edit-mode-21.css %>"
After="<% $SPUrl:~sitecollection/Style Library/~language/Core Styles/page-layouts-21.css %>" runat="server"/>
</PublishingWebControls:EditModePanel>
</asp:Content>
<asp:Content ContentPlaceHolderID="PlaceHolderPageTitle" runat="server">
<SharePoint:FieldValue id="PageTitle" FieldName="Title" runat="server"/>
</asp:Content>
<asp:Content ContentPlaceHolderID="PlaceHolderPageTitleInTitleArea" runat="server">
</asp:Content>
<asp:Content ContentPlaceHolderId="PlaceHolderPageImage" runat="server">
<img src="/_layouts/images/blank.gif" alt="">
</asp:Content>
<asp:Content ContentPlaceHolderId="PlaceHolderTitleBreadcrumb" runat="server"></asp:Content>
<asp:Content ContentPlaceHolderID="PlaceHolderMain" runat="server">
<table style="padding-top:0px;" border="0" cellpadding="0" cellspacing="0" ID="OuterZoneTable" width="100%">
<tr>
<td ID="OuterButton" colspan="2" >
<table style="width:100%">
<tr>
<td ID="OuterButtonLeft">
<WebPartPages:WebPartZone runat="server"
AllowPersonalization="false"
FrameType="TitleBarOnly"
ID="ButtonZoneLeft"
Title="Button_ZoneLeft" Orientation="Vertical"
QuickAdd-GroupNames="Default"
QuickAdd-ShowListsAndLibraries="false">
<ZoneTemplate></ZoneTemplate></WebPartPages:WebPartZone>
</td>
<td ID="OuterButtonMid">
<WebPartPages:WebPartZone runat="server"
AllowPersonalization="false"
FrameType="TitleBarOnly"
ID="ButtonZoneMidle"
Title="Button_ZoneMidle" Orientation="Vertical"
QuickAdd-GroupNames="Default"
QuickAdd-ShowListsAndLibraries="false">
<ZoneTemplate></ZoneTemplate></WebPartPages:WebPartZone>
</td>
<td ID="OuterButtonRight">
<WebPartPages:WebPartZone runat="server"
AllowPersonalization="false"
FrameType="TitleBarOnly"
ID="ButtonZoneRight"
Title="Button_ZoneMidle" Orientation="Vertical"
QuickAdd-GroupNames="Default"
QuickAdd-ShowListsAndLibraries="false">
<ZoneTemplate></ZoneTemplate></WebPartPages:WebPartZone>
</td>
</tr>
</table>
</td>
</tr>
</table>
</asp:Content>
Open Element.xml in MasterPage Module then delete URL MasterPage\ below
Copy Type="GhostableInLibrary" IgnoreIfAlreadyExists="TRUE" and paste to here

Deploy project
Go to Site Actions | Site Settings
In category " Look and Feel" click to " Page layouts and site templates "
link then select new page default settings is
(Page)mstechsharingLayou.aspx
Go to Site Actions | Manage Content and Stucture
Click to Pages
Add New Page
Typing Name: Home
Choose Page layout is "(Page)mstechsharingLayou.aspx"
Check in Page
Go to Site Action | Site Settings
In category "Look and Feel" click to "Welcome Page" link and set Wellcome page to page had created above
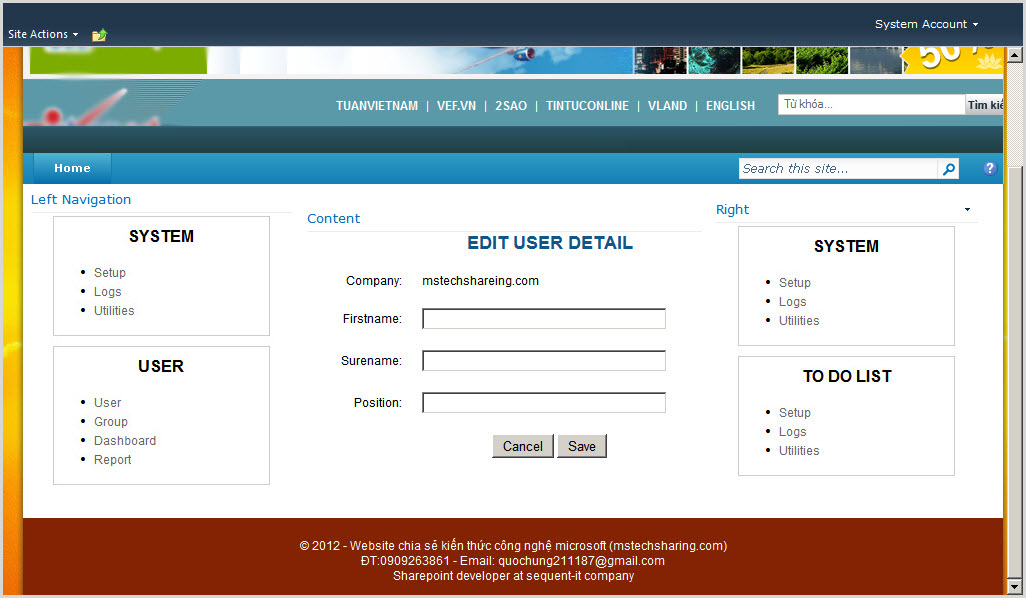
Back to home page | Edit Page and Insert image webpart (Left, center, right) as follows
download image at here

Have some problems
Go to Site Actions | Site Settings
At category "Look and Feel" click to " Page layouts and site templates " you will see a problem with the width as follow:
Solve:
Using firebug to find control which effect to UI
Decrease width from 3in to 2in on firebug to view result
Copy css from firebug to your mstechsharingdotcom.css
.areatemplate-select {
height: 1.75in;
width: 2in;
}
You will see UI as follow
Read more:
Deploy Branding Solution
- Part 1: Introduction to SharePoint 2010 Branding and WCM
- Part 2: Branding a Master Page.html
- Part 3: Refining the Branding of a Master Page
- Part 4: Adding Anonymous Support to Master Page
- Part 5: Branding SharePoint 2010 Search
- Part 6: Creating a Page Layout
- Part 7: Customizing Content Query Web Parts
- Part 8: Deploy Branding Solution
Reference:
http://www.microsofttechnology.net/2012/02/custom-master-page-and-page-layout.html
Subscribe to:
Posts (Atom)