Thursday 4 September 2014

Working with Large Lists in SharePoint 2010 - List Throttling

List throttling is one of the new options in SharePoint 2010 that enable to set limits on how severely users can put the beat down on your servers. In a nutshell, what it does is allow you to set a limit for how many rows of data can be retrieved for a list or library at any one time. The most basic example of this would be if you had a list with thousands of items, and someone created a view that would return all of the items in the list in a single page. List throttling ensures that such a request would not be allowed to execute. The hit on the server is alleviated, and the user gets a nice little message that says sorry, we can’t retrieve all of the data you requested because it exceeds the throttle limit for this list.
The kinds of operations that can trigger hitting this limit though aren’t limited to viewing data – that’s just the easiest example to demonstrate. There are other actions that can impact a large number of rows whose execution would fall into the list throttle limits. For example, suppose you had a list with 6000 items and a throttle limit of 5000. You create a view that only displays 50 items at a time, but it does a sort on a non-indexed column. Behind the scenes, this means that we need to sort all 6000 items and then fetch the first 50. If you are going to delete a web with large flat lists you potentially have the same problem. We need to select all of the items for all of the lists as part of the site deletion, so we could again hit the throttling limit. These are just a few examples but you can start to imagine some of the others.
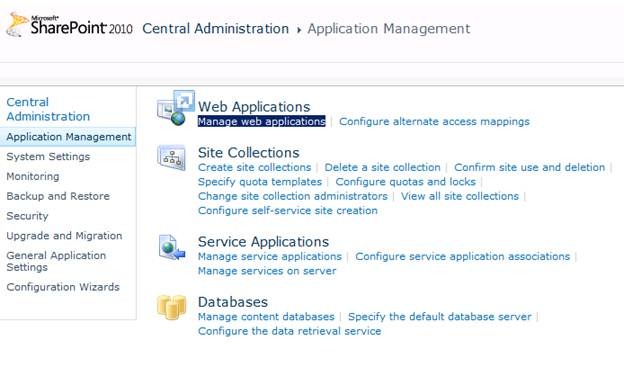
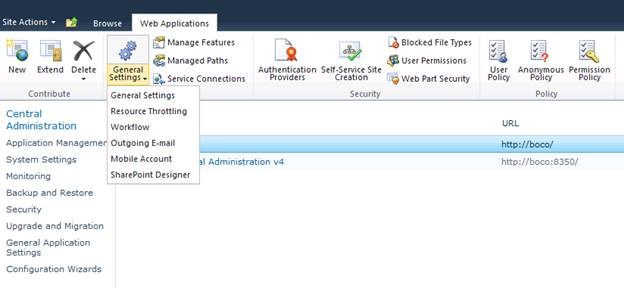
So how does this work and how do we manage it? It all starts in central admin. List throttling is an attribute that you will generally manage at the web application level. So if you go into Central Admin, click on Application Management, then click on Manage Web Applications. Click a single web application to select it, then in the ribbon click on the General Settings drop down and select the Resource Throttling menu item. It displays a dialog with the several options; I’ll only cover the ones related to list item throttling in this blog:
· List View Threshold – this is the maximum number of items that can be retrieved in one request. The default value is 5,000. Important to note as well, the smallest you make this value is 2,000.
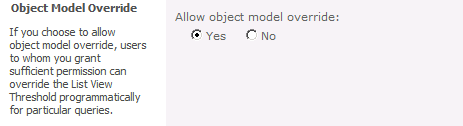
· Object Model Override – as described above, this option needs to be enabled in order to enable super users to retrieve items through the object model, up to the amount defined in the List query size threshold for auditors and administrators.
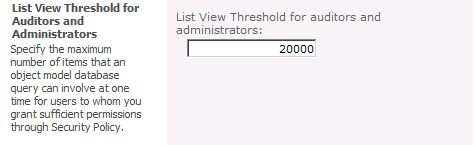
· List View Threshold for Auditors and Administrators – this is a special limit for “super users”. It is important to understand that this DOES NOT allow these super users to see more items in a list view. This property is used in conjunction with the Allow object model override property described below. That means that if the Allow object model override property is set to Yes, then these super users can retrieve up to the number of items set in this property, but only via the object model. The way you become a “super user” is a farm admin creates a web application policy for you that grants you rights to a permission level that includes either the Site Collection Administrator and/or Site Collection Auditor rights. By default both the Full Read and Full Control permission levels include these rights, and you can create your own custom policy permission levels that do as well. Creating this policy is done the same way as it was in SharePoint 2007.
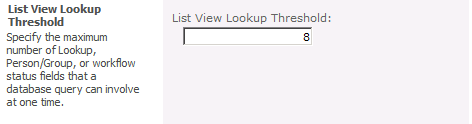
· List View Lookup Threshold – again, nothing to do with the maximum number of rows returned from a list but it’s right in the middle of these so I couldn’t leave it out. This one is self-explanatory I think.
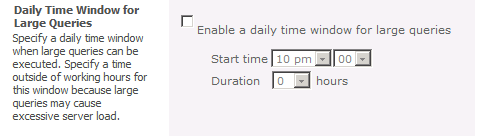
· Daily Time Window for Large Queries – this option allows you to create a block of time during the day, typically when usage is low, that you will allow queries to run and not enforce the list throttling limits. The one thing to remember here is that if you execute a query during that time period, it will run until complete. So if it’s still running when the daily window period closes, the query will continue to execute until all results have been returned.
There are a couple of additional exceptions to the information above:
1. If you are box administrator on the WFE where the data is being requested, and you have at least Read rights to the list data, then you will see ALL the rows. That means if you have 10,000 rows in a list and you execute a query or view that has no filters, you will get back all 10,000 rows.
2. In the object model a list (and library) is represented by the SPList class. It has a new property in SharePoint 2010 called EnableThrottling. On a list by list basis you can set this property to false. When you do that, throttling will not be enabled for views or object model queries. So again, if your list has 10,000 items and you execute a query or view that has no filters, you will get back all 10,000 rows.
In order to retrieve information using the object model in order to retrieve up to the number of items specified in the List query size threshold for auditors and administrators property, there is a property you need to set in your query object. The property is called QueryThrottleMode and it applies to the SPQuery and SPSiteDataQuery classes. You simply set this property to Override and then use your class instance to query. Here’s a simplified example:
using (SPSite theSite = new SPSite("http://foo"))
{
using (SPWeb theWeb = theSite.RootWeb)
{
SPList theList = theWeb.Lists["My List Name"];
SPQuery qry = new SPQuery();
qry.QueryThrottleMode = SPQueryThrottleOption.Override;
//set the Query property as needed to retrieve your data
SPListItemCollection coll = theList.GetItems(qry);
//do something with the data
}
}
Now that you know what the properties are about, let’s talk about the ways in which you use them. Assume the following scenario:
· # of items: 3000
· EnableThrottling property: true
· Default view: display items in batches of 3000
· List View Threshold property: 2500
· List View Threshold for Auditors and Administrators : 2800
· Object Model Override : Yes
· Method for OM Query: SPQuery with QueryThrottleMode = Override, query retrieves all items
Here’s how users would be able to access the data in the list:
User Type
List View
Object Model
Reader
No items shown; over threshold
No items returned; over threshold
Super User
No items shown; over threshold
No items returned; over admin and auditor threshold
Box Admin
3000 items shown per page
3000 items returned


Now let’s change the rules; the differences from the original scenario are highlighted in yellow:
· # of items: 3000
· EnableThrottling property: true
· Default view: display items in batches of 3000
· List View Threshold property: 2500
· List View Threshold for Auditors and Administrators : 3500
· Object Model Override : Yes
· Method for OM Query: SPQuery with QueryThrottleMode = Override, query retrieves all items
User Type
List View
Object Model
Reader
No items shown; over threshold
No items returned; over threshold
Super User
No items shown; over threshold
3000 items returned
Box Admin
3000 items shown per page
3000 items returned


Another scenario:
  • # of items: 3000
  • EnableThrottling property: false
  • Default view: display items in batches of 3000
  • List View Threshold property: 2500
  • List View Threshold for Auditors and Administrators : 3500
  • Object Model Override : Yes
  • Method for OM Query: SPQuery with QueryThrottleMode = Override, query retrieves all items
User Type
List View
Object Model
Reader
3000 items shown per page
3000 items returned
Super User
3000 items shown per page
3000 items returned
Box Admin
3000 items shown per page
3000 items returned


Final scenario:
  • # of items: 3000
  • EnableThrottling property: true
  • Default view: display items in batches of 2500
  • List View Threshold property: 2500
  • List View Threshold for Auditors and Administrators : 3500
  • Object Model Override : Yes
  • Method for OM Query: SPQuery with QueryThrottleMode = Override, query retrieves all items
User Type
List View
Object Model
Reader
2500 items shown per page
No items returned; over threshold
Super User
2500 items shown per page
3000 items returned
Box Admin
2500 items shown per page
3000 items returned


List throttling is a powerful tool but there are a few rules and roles you need to remember when planning your implementation. Hopefully this blog will help identify and clarify the functionality for you so that you can implement a design that makes sense for your scenario.


Reference:

http://blogs.technet.com/b/speschka/archive/2009/10/27/working-with-large-lists-in-sharepoint-2010-list-throttling.aspx


Performance with SharePoint 2010 Large lists – List view throttling


SharePoint 2010 lists and libraries can hold a maximum number of 30,000,000 items. In a SharePoint site the list view threshold is 5000 for users and 20,000 for auditors and administrators.
SharePoint large list and libraries operations like Delete/Update are one of the top performance killers.
What can we do if the server is overloaded when we access large lists and libraries? One solution is list view throttling.
A. List view throttling
List view throttling protects the server from unintentional load by limiting the number of list items returned per view. When the list view is greater than throttle limit, users receive a message that all the data cannot be retrieved.
Resource throttling monitors CPU %, Available Memory, ASP.NET Queue and Wait time in Queue. Every 5 seconds a timer job is checking resources. Throttling will begin after 3 unsuccessful checks. This throttling period will end after one successful check of the resources.
During a period of active throttling, HTTP GET requests and Search Robot requests will generate a 503 error and will be logged in the event viewer and no new timer jobs will begin.
Resource throttling counters can be changed via PowerShell commands. More in this article
Activate List throttling
Remark: Is recommended to configure at the Web Application level
- Go to SharePoint Central Administration
clip_image002
- Click on Application Management, and then click on Manage Web Applications.
clip_image004
- Click on a single web application to select it, then in the ribbon click on the General Settings drop down and select the Resource Throttling menu item
clip_image006
- A new page will open with the following fields:
- List View Threshold – this is the maximum number of items that can be retrieved in one request, all operations that exceed this limit are blocked. The default value is 5,000, the smallest is 2000.
clip_image007
- Object Model Override – this option needs to be enabled in order to enable auditors or administrators to retrieve items through the object model
clip_image008
- List View Threshold for Auditors and Administrators – this is a special limit for “super users”. Allow super users to retrieve up to the number of items set in this property via object model. Object model override needs to be activated. More in this article
clip_image009
- List View Lookup Threshold – This feature limits the number of Lookup, Person/Group, or Workflow Status fields that a query can perform. It should not be greater than 8
clip_image010
- Daily Time Window for Large Queries - this option allows you to create a block of time during the day, typically when usage is low, that you will allow queries to run and not enforce the list throttling limits.
clip_image011
- List Unique Permissions Threshold – This is the maximum number of unique permissions allowed per list or library
clip_image012
- Turn Backward-Compatible Event Handlers on or off. By default, this is off. If you have a large amount of development work in SharePoint Server 2007 that leveraged event handlers for lists or libraries, you will want to turn this on. You should check with your developers if you are upgrading from SharePoint Server 2007.
clip_image013
- Configure HTTP Request Monitoring And Throttling. This changes the setting in IIS for all Web servers in the farm for this Web application. You can turn request throttling off to allow services like search to run uninterrupted on the farm.
clip_image014
- Change Log constraints, do not to reduce this too much because it will negatively affect servers that rely on history information for sites contained in the Web application
clip_image015
- Click on Ok
Before applying list view throttling is recommended to test the functionality in a test environment by performing different stress tests.
B. SharePoint indexed columns
Another important step to improve list performance is indexing SharePoint columns. This option with query throttling strategies can help you to improve the performance of large lists.
You can index up to 20 columns but be aware that not all of the columns types are supported to be indexed. Here you have a complete list.
Activate Indexed columns
Remark: Before applying the following operations be sure you are doing them during the “Daily time Window” if List throttling is active, because creating an index requires accessing all the items in the list.
- Navigate to your SharePoint list and library
- In the ribbon, under List Tools or Library Tools, click the List or Library tab
clip_image017
- In the Settings group, click List Settings or Library Settings.
clip_image018
- Under the Columns section, click Indexed columns.
clip_image020
- On the Indexed Columns page, click Create a new index.
clip_image022
- Do one of the following:
To create a simple index:
- In the Primary Column section, under Primary column for this index, select the column.
clip_image024
- Click Create.
To create a compound index:
- In the Primary Column section, under Primary column for this index, select the column.
clip_image026
- In the Secondary Column section, under Secondary column for this index, select a different column.
clip_image028
- Click Create.
Thank you for reading this article.


Reference:

http://www.sharepointboco.com/performance-with-sharepoint-2010-large-lists-list-view-throttling/
 

Resource Throttling Settings for Large Lists

Consistent with its past behavior for this platform, SharePoint 2010 enhances those features we found to be 'good' with MOSS/WSS v3.0, improves upon those things we found to be 'not so good,' and offers us new functionality and features we wished were there in the previous iteration. One of these improvements is the ability to work with large lists - measured by the number of items included at the root of a list or in a view.

SharePoint 2010 permits a list to have up to 50 million items! Can you imagine the performance impact of such a list on the Web front-end, database, and other clients attempting to access a site which is attempting to process even half this number?!

Challenge:

How can I scale and manage large lists to optimize performance in SharePoint 2010?

Solution:

Large List Resource Throttling is a new SharePoint feature which allows limitations to be placed on a given list view. This new feature helps mitigate degradation in performance and can be configured by the farm administrators in Central Administration on a per-Web application basis.

To configure [or disable] the throttling options, simply browse to the Central Administration Web Application and, under the Application Management area, click the hyperlinked text, Manage web applications:


Select the Web application you'd like to configure from the list:


From the General Settings drop-down on the Ribbon, select Resource Throttling:


As you will see, there are a number of options from which Administrators may choose. The configurations allow SharePoint Administrators to:

  1. Set a block of time each day during which large list throttling does not occur. This time is not 'hard and fast' and may not be honored if, for example, a list is still rendering when the cut-off time is reached.

  2. Configure whether or not the object model can override these configurations. As a property, custom code can access and change this.

  3. Set customized permissions for Site Administrators and Auditors.


Notes:

  • Even though a large number of items [think over 500] can be displayed on a page, by default, SharePoint's paging feature will restrict this to 30 items per view with clickable arrow indicators to move forward or back through the pages.
  • The default number of items handled by the database for a single operation varies based on user group. For SharePoint Administrators and Auditors, the default is 20,000 and for end users it's 5,000.
  • Limitation: User accounts which belong to the local server administrators group are not affected by the throttling settings.
Reference:

http://community.bamboosolutions.com/blogs/sharepoint-2010/archive/2011/01/05/sharepoint-2010-cookbook-resource-throttling-settings-for-large-lists.aspx


SharePoint 2010 Cookbook: Content Organizer for a Document Library

SharePoint 2010 delivers a comprehensive set of document management features. In this article, we continue our series dedicated to uncovering those features with a look at how the Content Organizer works.

Challenge:

We use SharePoint document libraries in our portal to manage all of our electronic documents. The document libraries sometimes contain folders in a logical hierarchy structure to help us organize the documents. In SharePoint 2010, the upload process is better in the sense that you can choose a folder to upload to, but many of our users don't really know to which folder a document should be uploaded.

Is there a way to automatically upload and store the electronic documents based on some criteria such as the contents of a metadata field?

Solution:

With the Content Organizer, a new feature of SharePoint 2010, you can create rules that will automatically move an uploaded document to the appropriate/designated location based on content type and site columns. Follow these steps:

Step 1 – Activate the Content Organizer Feature

First, you need to activate this feature, and note that since this is a Site Scope feature, it is found under Site Actions > Site Settings menu on the Ribbon.

10-25-2010 10-51-29 PM

Click on Activate to make this feature available for your site:

Active Content Organizer

Step 2 – Content Organizer Settings

Once you have activated the Content Organizer feature for a site, you will find two new menu options under Site Settings: Content Organizer Settings and Content Organizer Rules.

10-25-2010 10-57-36 PM

The other thing that happens after the activation is that SharePoint will create a document library named DropOffLibrary along with a RoutingRules list. The Drop Off Library will be the default destination when a user tries to upload a document to this site. The Routing Rules list, as its name implies, contains the rules for how a document is to be routed to its final destination.

Next, configure your settings:

10-25-2010 11-19-11 PM

  • Redirect Users to the Drop Off Library: Set this check box to force all uploads to go to the Drop Off Document Library. When an individual document is uploaded, the document properties window for Drop Off Library is displayed, at which point metadata properties can be filled in and the submission process completed. After submission, the routing rules are applied to route the document appropriately and the user is shown the final URL for the item.
  • Sending to Another Site: Set this property to allow rules to be created that direct uploads in the current site to be sent to another site in your SharePoint Web app. The destination site must also have the Content Organizer feature installed and activated. You can only route documents within a SharePoint Web application.
  • Folder Partitioning: This features allow you to create a threshold limit on how many documents can be stored in a document library. SharePoint 2010 recommends a maximum of 5,000 documents per folder. Once the limit is reached, you can instruct SharePoint to automatically create a new folder, route documents to that new folder, and let the user know about the URLs of the final destination. 10-25-2010 11-19-34 PM
  • Duplicate Submissions: Use this option to let SharePoint decide what to do when you upload an item that already exists in the library. You have the option to create a new version (if versioning is enabled in the document library), or to append unique characters to the end of the new file.
  • Preserving Context: Set this check box to send the audit logs and properties of the documents along with the documents when you route the item to another site. 10-25-2010 11-20-34 PM
  • Rule Managers: Add the users or groups that you want to be able to manage rules used by the Content Organizer. These users must also have Manage Web Site permission in order to edit rules. Step 3 – Content Organizer Rules
    Next, click on the Content Organizer Rules link to go to the popup form where you specify the rules.
    10-29-2010 2-58-52 PM
  • Rule Name: Set a name.
  • Rule Status and Priority: Enable the rule and choose a priority for the rule, from 1 (highest priority) to 9 (lowest priority). This is useful when you have more than one rule and want to be able to select which one should be applied first to the uploaded documents.
    10-29-2010 3-04-10 PM
  • Submission's Content Type: Select a Content Type to apply the rules. The drop down list box only shows the content types that are based on the Document content type. The alias check box allows you to define the same content types that were renamed in other sites. When the document is uploaded and its content type matches the names, the rule will apply to them as well.
    10-29-2010 3-07-08 PM
  • Conditions: the Conditions setting is where the real power of this feature lies. You can create up to six conditions where the properties of the items must meet certain values. In this example, we will set a condition where a document begins with the prefix “SA12” in its title.
  • Target Location: Select a destination folder (it could be on the same site or a different document library in a different site) to route the document to when it has met all the criteria you set above. Note that you must enable cross-site routing (see settings in the section above) in order to see the site routing options in this form. You can also set the folder naming convention if you choose to create a new folder. Step 4 – Upload
    Let’s try it out. Go to any document library on your site and use the Add new document link.
    10-29-2010 3-29-51 PM
    Select a document to upload. Once the document has been uploaded, you will see the properties form below. Note the title of the form where it says “Drop Off Library”? Remember that when you add a Content Organizer rule to the site, it automatically adds any document to the Drop Off Library.
    10-29-2010 3-43-04 PM
    This form also gives you a warning that the document will be moved. Fill in the properties for this document, and make sure you follow the rules. In our exmaple, we will add a “SA12” prefix to the Title of the document. Next, click the submit button:
    10-29-2010 3-45-54 PM
    You will then receive a notification indicating where the document was routed to. Note that if the document cannot be moved, whether there is an issue or if your conditions are not met, SharePoint will leave the document in the Drop Off Library.
    In conclusion, the Content Organizer is a very cool feature in SharePoint 2010. It allows you to capture a set of standard documents and route them to the proper destination, and the end user doesn't have to worry about where it should go. This feature should be used in conjunction with Document IDs, Term Sets, and Metadata publishing in order to design an effective document management strategy for your SharePoint portal.
    Notes:
    The Content Organizer has the following limitations that you should beware of:

    • Content Organizer feature is only available in SharePoint 2010 Server and is not part of the SharePoint Foundation 2010.
    • Content Organizer will only work on content types that are of, or derive from the Document content type, so make sure that you inherit from this content type when creating a custom document library.
    • You cannot route documents to a Document Set. This one should be on the wish list for the next release!
    • The routing action is performed using the App Pool account of your Web applications.
    • You cannot route the document outside of a Web app, farm, or SharePoint at all. All of this could be done with workflow rules instead. In fact, there are a lot of things that should be done with workflow instead of Content Organizer, which is designed to handle document uploads.
    • There are a whole bunch of events that effect a document library; you should beware the order of executions that could affect the handling of these documents:
      • Any workflow that is attached to a document library will be run first
      • Next to be executed is Event Receiver, although the actual priority can be set programmatically by the developers
      • Last is the Content Organizer.

  • Reference:

    http://community.bamboosolutions.com/blogs/sharepoint-2010/archive/2010/11/03/sharepoint-2010-cookbook-content-organizer-for-document-library.aspx