Showing posts with label Workflow. Show all posts
Showing posts with label Workflow. Show all posts
Sunday, 7 December 2014
Saturday, 6 December 2014
How to Set Item Level Permission Using SharePoint Designer 2010 Work Flow
There are situations where we want to set item level permission dynamically whenever an item is added to a SharePoint list. Here we can see a demo of a SharePoint designer workflow to achieve the same.
Here I am taking the scenario, when an item is added to the list I want to set the permission only to the user who created it and to the owners of the list. In SharePoint 2007, we have to go for an event handler but in SharePoint Designer 2010, we can write a custom workflow to do it.
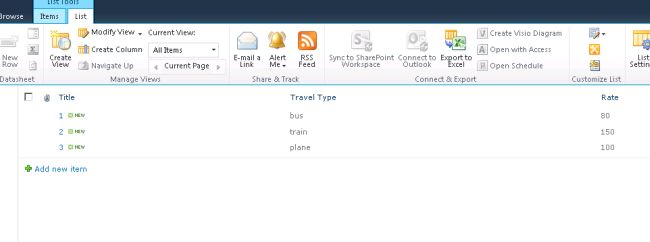
1. For the startup I have created a list as shown in the following, named Ticket:
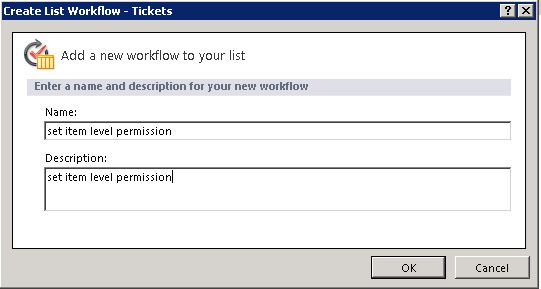
2. Open the SharePoint designer and click on the work flow and select the list (Ticket):

3. Give a name to the work flow:
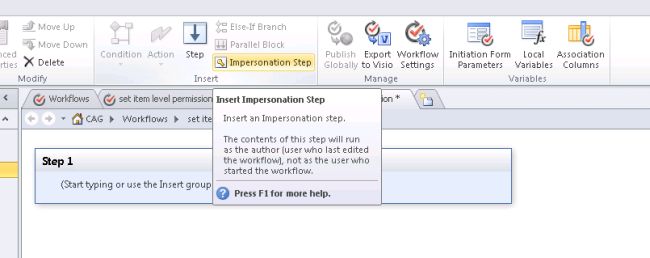
4. Select Impersonation from the ribbon as shown below:
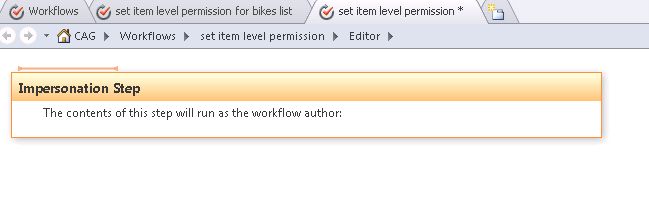
5. You will get a screen like below:
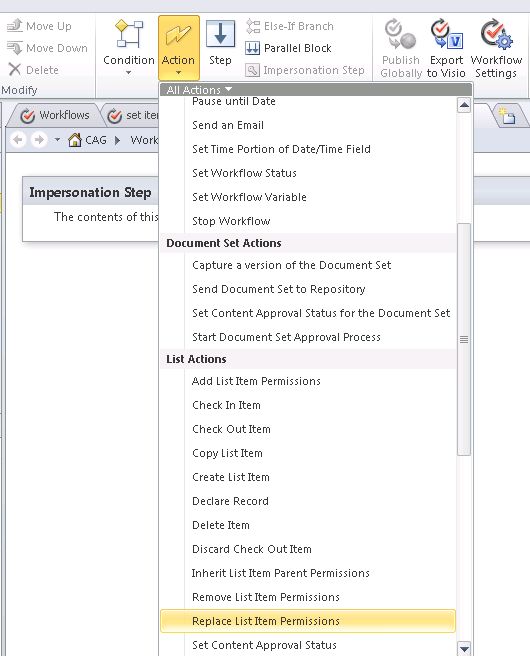
6. Select Action from Ribbon and choose Replace item level permission from the menu:
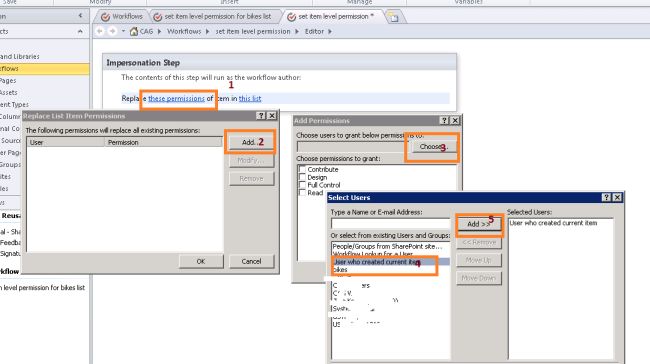
7. You will get a screen like as shown below. Click on the order as I show in the figure:
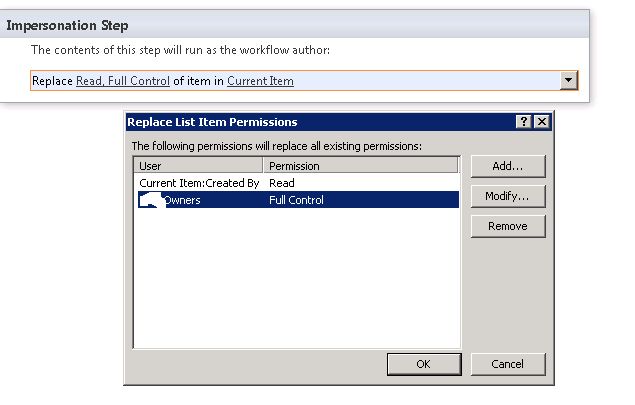
8. You can click on Add to add owners also to the list:
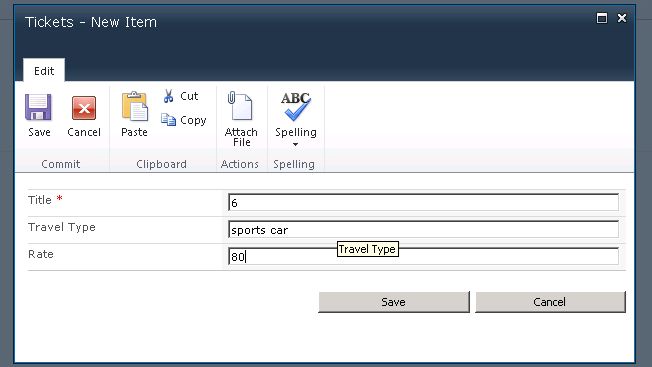
9. We are done with the workflow. Now we can test our workflow. I am just adding an item to test the work flow:
10. Click on the item we created now and select manager permissions:
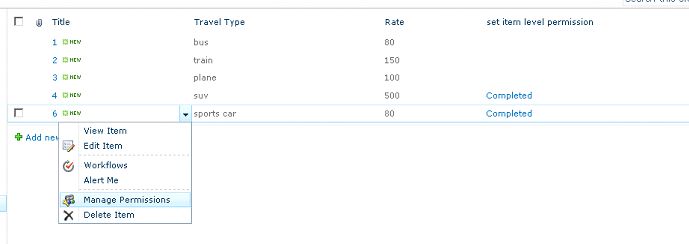
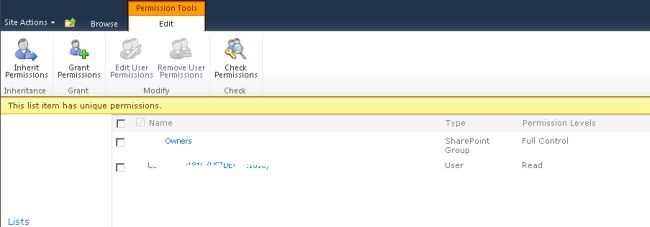
11. You can see the Owner group and the user who created the item is added to the permission of the item and all other users and groups are removed from that particular list item:
Reference:
http://www.c-sharpcorner.com/UploadFile/Roji.Joy/how-to-set-item-level-permission-using-sharepoint-designer-2/
Wednesday, 3 December 2014
Two level approval workflow in sharepoint designer 2010
Issue :-
It's needed to create two level approval
Solved by SharePoint designer

* Create two variables that hold users for first and second manager.
Find Manager of current item then set variable manager 1
Find Manager of manager 1 then set variable manager 2
* Log to Workflow history
* At first manager Approval
we will set variable IsItemApproved = true if approved and
set variable IsItemApproved = false if rejected


Reference:
http://sharepointegyptianstyle.blogspot.in/2012/10/two-level-approval-workflow-in.html
Tuesday, 2 December 2014
SharePoint 2010 Workflow Interview Questions
These are the basic level questions which can be asked in a interview. I will write a separate Post for high-level workflow interview questions.
Q. What is a workflow?
Ans. Workflows are the way an organization functions, a series of actions that correspond to a work process, such as the process for purchase orders.SharePoint 2010 helps you automate these workflows, thereby increasing the efficiency and productivity of the organization.
Q. What are the types of workflow that you can design in SharePoint 2010.
Ans. you can design List Workflows, Reusable List Workflows and Site workflows using SharePoint designer 2010.
Q. What Reusable List Workflows and Site workflows ?
Ans.
Reusable List Workflows -
You can create a reusable list workflow (reusable workflow) in the top-level site in the site collection, and that workflow can be made globally reusable — meaning that the workflow can be associated to any list, library, or content type in the site collection. You can also create a reusable workflow in any subsite in the site collection; this workflow is available for reuse in that particular subsite.
Site workflows - A site workflow is associated to a site — not to a list, library, or content type. So unlike most workflows, a site workflow is not running on a specific list item. Because of this, many of the actions that are available for items not available for site workflows.
Q. Can you modify the Out-of-Box workflows in SharePoint 2010 ?
Ans. In SharePoint 2010, you have an option to customize the Out-of-Box workflows. The four most popular workflows in SharePoint Server 2007 — the Approval, Collect Feedback, Collect Signatures, Publishing Approval workflows — have been completely rebuilt as declarative reusable workflows, meaning that they are now fully customizable in SharePoint Designer 2010.
Q. What are events, actions, conditions and steps?
Ans. Lets look at this one by one.
Events - An event is what starts or initiates a workflow. Events can also be used to manage the timing of actions within a workflow, such as waiting for the status of an item to change. There are three events that can start a workflow:
* An item is created.
* An item is changed.
* A workflow participant clicks a start button on the SharePoint site.
Actions – An action is the most basic unit of work in a workflow. SharePoint Designer 2010 provides a set of ready-made, reusable actions for you to incorporate into your workflow.
For example, your workflow can:
* Create, copy, change, or delete list items (including documents).
* Check items in or out.
* Send an e-mail message.
Conditions - When you design a workflow, you can use the workflow editor to create rules that apply conditional logic to SharePoint sites, lists, items and content types. A rule establishes a condition where the workflow performs the associated action only if that condition is true. For example, you can create a rule where the workflow sends a reviewer an e-mail message only if an item is created by a specific person.
Q. What are Parallel and Serial actions ?
Ans. When you have more than one action associated with a condition, the actions can be set up to run at the same time (parallel) or one after another (serial), the default.
Q. What are the Types of forms associated with the workflow ?
Ans. With SharePoint Designer 2010, you can create three types of workflow forms:
Initiation form – An initiation form gathers information from the workflow participant when they start the workflow. It is automatically generated when you create the workflow in SharePoint Designer 2010. Initiation forms are displayed to users when they manually start a workflow on a given SharePoint item. With an initiation form, users can specify additional parameters or information about the workflow as it applies to the given SharePoint item.
Task form – A custom task form allows workflow participants to interact with tasks in the Tasks list specified for the workflow. With the Custom Task Wizard, you can easily create custom form fields and add them to a custom task form. When you finish designing the workflow, SharePoint Designer 2010 automatically generates the InfoPath or ASP.NET forms for your custom tasks.
Reusable workflow – association form – A reusable workflow, by default, only provides the fields common to all items, such as Created and Modified by. This is because a reusable workflow isn’t by default associated with a list, library, or content type. An association form enables you to associate fields with a reusable workflow so that the fields will be available when you design and run the workflow.
Q. When are these forms get created ? And how do you customize it ?
Ans. SharePoint Designer 2010 automatically generates the forms, but you can customize them by going to the settings page for the workflow, in the Forms section, click the form you want to customize. Workflow forms are either InfoPath or ASP.NET pages. They are stored on the SharePoint site with the workflow source files.
Reference:
http://www.learningsharepoint.com/2010/07/26/sharepoint-2010-workflow-interview-questions/
Sunday, 23 November 2014
How to implement reusable workflows on multiple lists in SharePoint 2010
Problem
In SharePoint, a List is one of the most usual ways to store data. We can have multiple lists using the same kind of data (i.e. the Finance and Sales department lists could share the same kind of employee data -- name, address, experience in years and experience level). Now in such a scenario, what if one wants to implement a single centralized workflow which would apply the same automation process to both lists?Solution
For such a scenario, SharePoint 2010 has introduced a new kind of workflow which is called a "Reusable Workflow". One use of this kind of workflow is to create it and attach it to different lists. This would be created on a content type. So it could be attached to only the lists which implement the same content type on which the reusable workflow is created.Let us start by creating a content type. Create a content type similar to what is shown in image (below) and name it "EmployeeContentType". Also create two lists. One named "Sales" and the other named "Finance", both using the same content type.

Now open the web application in SharePoint Designer 2010 and click on workflows. On the top ribbon, click on reusable workflow.

Provide a name to the workflow and select the content type on which the workflow should be created. In our case it is "EmployeeContentType".

Now we have added a simple workflow which will update the employee experience level field according to the years of experience of employee.

Save and Publish it. Now for attaching it to multiple lists, you need to check with which list the workflow could be attached? To do so, click "Associate to List" on the top of the ribbon of SharePoint Designer. At the back end, a web service will fetch the list depending upon the content type applied to the list. In our case there are two lists "Sales" and "Finance". Click on "Sales".

A window will appear which would be similar to an out of the box workflow creation window. Here we need to take care of 4 things:
1) Select the same content type on which the workflow is created -- which in our case is "EmployeeContentType".
2) Select the name of the reusable workflow (which in our case is "EmployeeWF").
3) Provide a unique and meaningful name to the workflow for identification.
44) Configure the start options of the workflow as required.

After performing the above steps, create the workflow. Now we have a sales list with some data.

Now to trigger the workflow, one can edit the items and save it -- accordingly the workflow will update the experience level field values.

Perform the steps for associating the workflow to the finance list until updating the values just like we did in the sales list.

Now the finance list will share the same kind of workflow and values updated accordingly.
Next Steps
- Use a reusable workflow, to create a similar workflow for multiple list.
- Use it to reduce redundancy as well as to maintain a single, centralized workflow
- Return to MSSharepointTips to read about other topics and ideas.
- Check out MSSQLTips.com for great information about Microsoft SQL Server.
Reference:
http://www.mssharepointtips.com/tip.asp?id=1095
Thursday, 20 November 2014
How to create a reusable workflow in SharePoint Designer (SharePoint 2010)
-
Synopsis
This guide will show you how to create a reusable workflow in SharePoint Designer. -
Applicable to
All PlexHosted SharePoint 2010 accounts. -
Prerequisite
- a PlexHosted SharePoint 2010 account
- a PlexHosted SharePoint 2010 sit
- SharePoint Designer
Introduction: SharePoint 2010 gives you an ability
to create a reusable workflow and associate it to a content type. Then
you can easily associate this workflow to a library or list that uses
this content type. What is more, you can make this workflow globally
reusable and you will be able to use this workflow at any site or sub
site within your site collection. -
How to
- First of all you need to create a new content type for reusable workflow (you can associate a reusable workflow to the existing content type as well). Create a content type like shown at the screen below (note that we`ve created a new Experience Level column of Choice type with values – blank, Beginner, Intermediate and Specialist and added it to this new content type):
- The next step is to create a list that uses this newly created
content type. Let`s create the Employee Experience list and add the
Experience Level Content type as default to this list.
- Create new list.
- Click on List settings – Advanced settings.
- Under the Allow management of content types? choose Yes and click OK.
- Return to List Settings page and click on Add from existing site content types hyperlink.
- Add the Experience Level Content type to the list.
- Click on Change new button order and default content type hyperlink and set this content type as default for the Employee Experience list.
- Modify the view of the list so that it contains all required fields.
- Now open your SharePoint site in the SharePoint Designer.
- Click on Reusable Workflow button to create new workflow.
- Enter the name and description of new workflow, choose your newly created content type in the Content type field and click OK.
- Define the steps of your new workflow. In our example, we created a simple workflow which will set the employee experience level according to the years of experience of employee.
- Click on Publish.
- Then click on Workflow Settings.
- At the Workflow Settings click on Associate to List. You will see all the lists that use Experience Level Content type in the drop-down menu. Choose the newly created Employee Experience list.
- A new Add a workflow tab should open in your browser. Choose Experience Level Content type in the Content type section. Select the Experience RW reusable workflow template in the Workflow section. Give a unique name for this workflow.
- Choose the start options for your workflow and click OK.
- You will see that the Experience reusable workflow has been created.
- To check how this workflow works add the new item to the Employee Experience list. Click on Add new item or click at the New Item drop-down menu in Items tab and choose Experience Level Content type.
- Fill in the form with the necessary data. You can leave the experience level field blank or choose the incorrect value in it in order to check how the workflow will update this field.
- Refresh the page and you will see that the status of our workflow is Completed and the Experience level is set to Beginner.


 If you need further assistance, please do not hesitate to contact the PlexHosted support staff.
Reference:
http://plexhosted.com/billing/knowledgebase/255/How-to-create-a-reusable-workflow-in-SharePoint-Designer-SharePoint-2010.html
How to create a simple List workflow in SharePoint Designer (SharePoint 2010)
-
Synopsis
This guide will show you how to create a simple List workflow in SharePoint Designer -
Applicable to
All PlexHosted SharePoint 2010 accounts. -
Prerequisite
- a PlexHosted SharePoint 2010 account
- a PlexHosted SharePoint 2010 site
- Microsoft SharePoint Designer program
-
How to
- Open the Microsoft SharePoint Designer.
- Click on File tab and Open your SharePoint site.

- At the New Item tab choose List workflow.

- Specify the name of your new workflow and the list to associate with it. The list you can choose from the drop-down menu.

- You will see 1 step of your workflow. To begin, you need to add a condition to it. Choose the needed condition by clicking on the Condition button. For example - if any value equals value. (You can use any number of steps for your workflow and set them to run parallel or in sequence.)


- Specify the values for your condition (For example, Created by equals name/names):
- Define the First value (click on value hyperlink and choose the necessary settings from the drop-down menus)
- And the second value. (Choose the name of a person)


- Choose the Action for the condition created. (For example, Send an Email).
- Specify the values for your action (choose the receiver of the action - for our example).

- After all the necessary conditions and actions are configured, click on the Check for Errors button. If there are any mistakes in the steps you will see and correct them.

- Click on the Workflow Settings button and choose the necessary start options for your workflow. You can set the workflow to start manually or automatically.

- Click Save, and then Publish


Reference:
http://plexhosted.com/billing/knowledgebase/227/How-to-create-a-simple-List-workflow-in-SharePoint-Designer-SharePoint-2010.html
Subscribe to:
Posts (Atom)