Showing posts with label Moving Sites and Solutions. Show all posts

Tuesday, 9 December 2014

Synchronizing Content Between Farms on SharePoint 2010

Excellent Article by Mor Shemesh

 In this post I'm going to give a concise review of all the solutions I've came across that enable Copying and Synchronizing content between SharePoint Farms (also Deploying Content Between SharePoint Farms) mainly for the purpose of migrating developments and implementations between environment once they have changed.

These solutions are relevant for SharePoint 2010 and provide a collection of articles and links to make the decision more comfortable.

Why?
First off, I wanted to do this post because I've heard many clients that ask me about the right way, wrong way and best way. The truth is like always, it depends.

First Migration
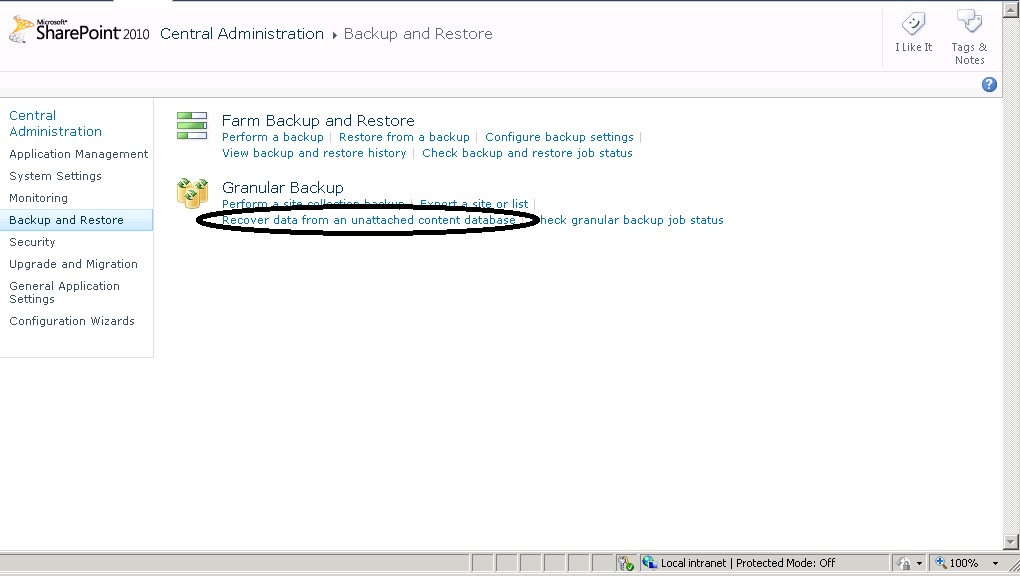
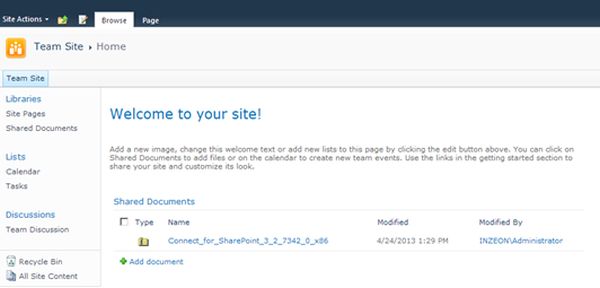
When developers first intend to migrate a solution between environment they would usually choose to perform a backup\restore of the Site Collection using Backup-SPSite and Restore or using Export-SPWeb and Import-SPWeb.
I personally like to use the backup\restore approach.
If the given site is particularly large and contains many developments\implementations I always try to plan and build the site in a separated Content Database and add that content database to the target environment.

Backup\Restore
Here are a few helpful links on the matter (best examples I found were on MSDN):
Backup: http://technet.microsoft.com/en-us/library/ff607901.aspx
Restore: http://technet.microsoft.com/en-us/library/ff607788.aspx

Export\Import
http://secretsofsharepoint.com/cs/blogs/tips/archive/2010/09/17/importing-amp-exporting-sites-in-sharepoint-2010-using-powershell.aspx

The big differences:
Backup\Restore will move all your data and rights, plus, it will create the corresponding records in the content database. Export\Import is quite a different approach. It will export all the file, data and metadata into a cab file from which it will import and create the new content. You can use it only for web sites (not site collections). It can also move the site security as well if you set the corresponding flags. Check the other options to see the different options

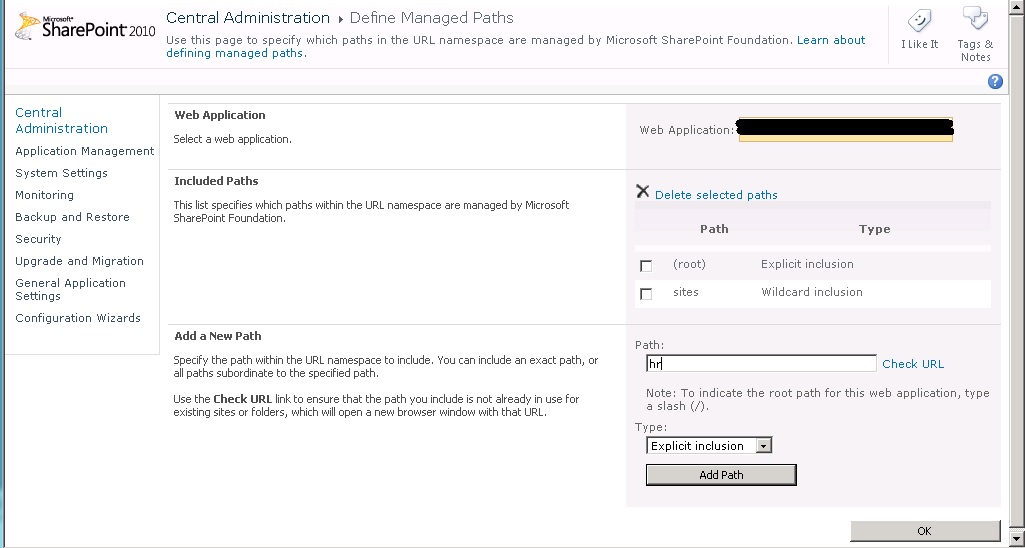
Add a new Content Database:
technet.microsoft.com/en-us/library/cc825314.aspx

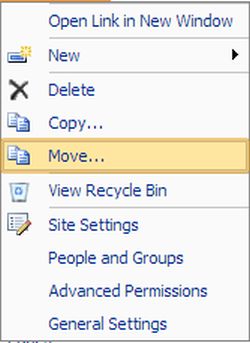
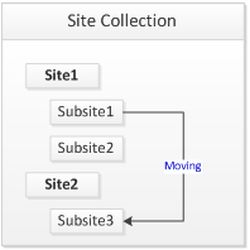
Move SharePoint Site between Content Databases:
http://technet.microsoft.com/en-us/library/cc825328.aspx

Detach Attach Content Database:
http://drekendrop.blogspot.co.il/2011/03/sharepoint-2010-detach-sharepoint.html

Site Templates
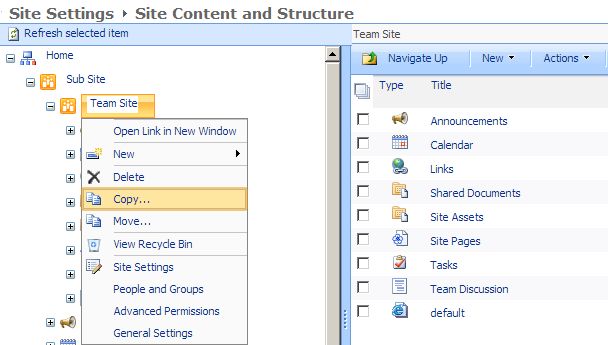
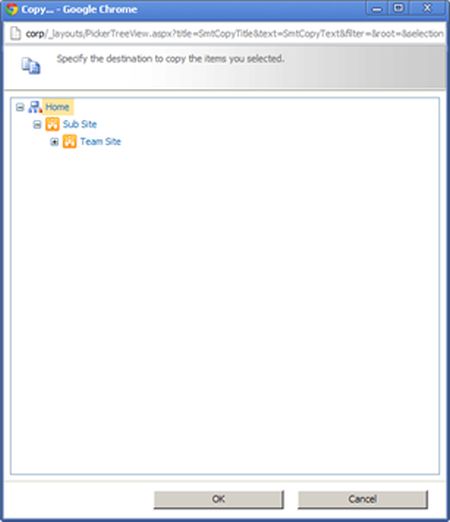
Another approach I see sometimes taken is saving the site as template and creating a site from that template in the destination environment (Thanks to Ohad Ben-Shalom for pointing that one out).
You can also achieve that on a site collection by creating a new site collection and later choosing the template:
http://www.toddklindt.com/blog/Lists/Posts/Post.aspx?ID=218

Keeping it all Synchronized:
Mainly, there are 3 main approaches:

  1. Content Deployment Job (Manual)
  2. Open Source Solution (Manual)
  3. Third Party Solutions (Manual\Automatic)
All of the solutions I will present here are based on the Export\Import Object Model provided by SharePoint. This is also the same method stsadm -o export\import and Export\Import-SPWeb (PowerShell) use when run from the console.
For more information click here: SPExport and SPImport.

The big difference between each approach is how flexible it is against how much effort you would need to suite it to your needs.

Approach Cost Flexibility Pro Con
Content Deployment OOTB None OOTB and little configuration No Flexibility\granularity. Content will have to stay identical to source environment
Open Source None Very Very flexible and can be changed according to client needs Required Programmers for development
Third Party Solutions Varies Highly flexible (you can probably find any need you might have answered by one or another product) No code, flexible, comfortable Can reach very high cost. You might depend on company's customer care.

Solutions

SharePoint Content Deployment Job
When to use and how to prepare to use Content Deployment (MSDN):

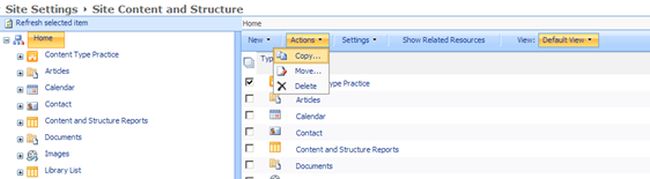
How to define Content Deployment:
According to Technet you can perform the following actions between farms so long as they have trust relationship between both domain and farms.

Pros:
  • Easy to use
  • Out of the box
Cons:
  • The content in the target environment will always have to remain identical to the content in the source environment
  • No Flexibility
Usage of Open Source Code and Code in General
SPDeploymentWizard from CodePlex (includes a user interface): 
Including a set of PowerShell Functions for performing Export\Import between sites.

Examples of how to use SPExport and SPImport from MSDN:

Third Party Solutions
I've came across mainly 4 third party solutions:

AvePoint DocAve Replicator:

Repliweb ROSS:


Metalogix:

All Products offer basically the same functionality (plus, minus different perks here and there), but what differentiates them one from another is the quality of the product and the support they offer.
Personally I haven't used any of them, but from what I can gather in the market and from all the people I come in contact with, AvePoint company's (DocAve) products do the work and they provide a very high level of customer service and support.

Summary
For conclusion I will give you the way I perform the deployments between environments:
  1. Each project should be checked and planned for individually before development\implementation begins.
  2. It is always preferable to create the site as a new Site Collection (and if there is sufficient need you can create the Site Collection on a new Content Database)
  3. First Deployment\Migration with Backup-SPSite\Restore-SPSite (If this is a Content Database you can migrate with DB Backup\Restore or Detach\Attach)
  4. Incremental deployment of content with SPDeploymentWizard.

Please feel free to comment on this post with experiences you've had with products and how you work when synchronizing between environments or you disagree with what I wrote.

Reference:

http://morshemesh.blogspot.in/2012/08/synchronizing-content-between-farms-on.html

Basic steps for Moving a SharePoint site collection between domains

Before you start
Make sure SharePoint versions are the same on source and destination servers, service packs and patches.

Permissions
There are some basic permissions that need to be configured (if they have not already).
See Add-SPShellAdmin. If you are using Windows authentication to connect to SQL Server, the user account must also be a member the SQL Server dbcreator fixed server role on the SQL Server instance where the database will be created. If you are using SQL authentication to connect to SQL Server, the SQL authentication account that you specify when you create the content database must have dbcreator permission on the SQL Server instance where the database will be created.

Add-SPShellAdmin -UserName Domain\User Name

Migrate Data
Backup Site Collection on Farm A.
On the server farm that contains the original site collection open a SharePoint 2010 Management Shell.
In the power shell window type the following command:
Backup-SPSite –Identity http://FarmASiteCollection -Path TempPathAndFileName.bak -Force
Force will overwrite a previously backup file.

Create Content Database on Farm B.
Assuming the appropriate Web Application already exists then you just need to create a new content database.
On the server for farm B open a SharePoint 2010 Management Shell.
In the power shell window type the following command:
New-SPContentDatabase -Name ContentDbName -WebApplication WebApplicationName
 -
DatabaseServer DBServerName

Restoring Site Collection on Farm B.
In the power shell window type the following command:
Restore-SPSite –Identity FarmBSiteCollection -Path TempPathAndFileName.bak
-DatabaseServer DBServerName -DatabaseName ContentDbName

Restore Access/Permissions
You need to add a user via command line because the restored site will deny all of your login attempts (unless your server is on the same domain as the original source server).

Using the central administration console, you will note that the site collection still references the original administrators which are now invalid on this new domain.
NOTE: you can view using following steps >> Central Administration >> Application Management >> Site Collection Administrators (on Farm B SharePoint central administration domain).

·         Now you need to change ownership of the site collection using following command.
Set-SPSite –Identity FarmBSiteCollection -OwnerAlias “domain/User”
·         Now if you refresh central admin console you will see the new administrator as an owner, you can change the secondary administrator at this point as well using same utility.
Set-SPSite –Identity FarmBSiteCollection - SecondaryOwnerAlias “domain/User”
·         Now reset the IIS and you can login the main site collection as an administrator.
·         Then you can optionally run this to clean up the old lingering logins explicitly
Move-SPUser –Identity olddomain\UserName  - NewAlias newdomain\UserName


Reference:

http://shaunedonohue.blogspot.in/2011/06/basic-steps-for-moving-sharepoint-site.html

Moving a Sharepoint Site Between Farms With Different Templates


A client came to be with a pretty scary problem.  Their SharePoint site was totally down.  The databases were there but the actual SharePoint farm was totally dead.  All of the SharePoint tools said that the farm wasn’t configured yet so there were some pretty big problems.  Thankfully they had a second SharePoint farm available so we decided to attempt to move the stuff from the broken farm to the new farm.
The first step was to backup the SQL Server database and restore it to the new SQL Server.  No problems there, just a normal SQL Server backup and restore operation (just make sure that you don’t restore over an existing database).  The next thing to do was to get the data from the SQL Server database that SharePoint didn’t know anything about into a SQL Server database that SharePoint did know about.  This is done by going into Central Administration and selecting the “Backup and Restore” option.  Then within the “Granular Backup” section selecting “Recover data from an unattached content database” as shown below.


http://cdn.ttgtmedia.com/ITKE/uploads/blogs.dir/20/files/2012/08/Sharepoint1.jpg

Now go back into the Create
On the next screen give SharePoint the server, database and authentication information for the database you just restored.  I then selected the “Export site or list” radio button at the bottom and clicked “Next”.  The next screen allows you to select specific sites to export.  In my case I wanted everything so I changed the “Site” drop down menu to “No selection” and entered a filename.  I didn’t bother with security as we were changing Active Directory domains anyway.  I left the default option of exporting all versions so that any version history would be maintained and clicked the “Start Export”.

Depending on how large the content database is you may have time for coffee, dinner or to take the weekend off.

When it was finished I discovered some really big annoyances.  The biggest being that the template used for the old SharePoint farm was different from the template for the new SharePoint farm.  This meant that I wasn’t able to import the data directly like I wanted to.  The new farm was created using the template “SPSMSITEHOST#0″ while the old farm was done using the template “ENTERWIKI#0″ (I found this out when I tried to use the import-spweb powershell cmdlet to import the data).

So in order to get the data imported as quickly as I could the solution that I came up with was to create new Site Collections for the 2 sites that needed to be restored.  To do this you go into Central Administration and select “Application Management” from the menu on the left.  Then under “Site Collections” select “Create Site Collection”.  Now on the left half of the screen in the “Web Site Address” section you can click “Define Managed Paths”, do that and create a managed path for the URL you want, in this case /hr.  The type of path should be Explicit inclusion as shown below.

 http://cdn.ttgtmedia.com/ITKE/uploads/blogs.dir/20/files/2012/08/Sharepoint2.jpg


After clicking Add Path then OK go back into the “Create Site Collection” screen.   On this screen give the site collection a name, in this case “Human Resources” (you can imagine that HR wanted this back up quickly).  Select /hr (or whatever you just created) in the URL field.  For the template either select the template if you know what it is, or select the custom tab and choose “< Select template later… >”.  Set the primary and secondary admins and the quota template as needed and click OK.
You’ve now prepped the production SharePoint site to accept the data.  Now comes the really annoying part.  There’s no way to import (that I could find) just part of the site from the backup file as I didn’t want a site collection but rather a subsite.  In order to get just a subsite into the backup file I had to create a temporary web application (another TCP listener) for SharePoint that was separate from the main site.  This is also done from Central Administration  by clicking on “Application Management” from the left hand menu.  Then on the right under “Web Applications” click the “Manage web applications” link.  From here you can create a new Web Application by clicking the new button at the top left of the screen.  Give it the TCP port and the IIS web site name as needed with the needed security information based on your companies policies.  You’ll then need to go into Application Management and under Databases use the “Manage content databases” link to add a content database to the new Web Application.  You can then restore the entire old SharePoint site to this new temporary Web Application by using the import-spweb powershell cmdlet as shown below.
import-spweb http://site:port -Path ‘c:\backups\YourBackupFile.cmp’ -force
Once that is done we can now backup just the specific sites that we want to move.  Go back into Central Administration and select “Backup and Restore”.  Under “Granular Backup” click the “Export a site or list” link (you can see it in the first screenshot above).  In the backup screen select the Site Collection and Site that you want to copy to the new farm, specify a filename to backup to (I used c:\denny_backups\hr\hr.cmp) and click “Start Export”.  Once it’s finished use import-spweb to import the data into the production site as shown below.
import-spweb http://site/hr -Path ‘c:\denny_backups\hr\hr.cmp’ -force
Repeat this last paragraph for each site that you need to move (and that you have already created site collections for.
Needless to say when this was all done the client was happy because everything was back up and running (after doing a little bit of DNS changing) so all and all it was a successful day.


Reference:

http://itknowledgeexchange.techtarget.com/sql-server/moving-a-sharepoint-site-between-farms-with-different-templates/

Copy site collection from source farm to target farm


Copying content allows the replication of production data in another environment. The result will be identical environments, which provides the ideal testing environment.

Prerequisites

In order to successfully restore your data, make sure you fulfil the following requirements:
  1. Your account is in the local admin group of the production environment
  2. Your account is in the local admin group of the target environment
  3. The production environment should have the same or a lesser patch version than the target environment.
  4. Both environments should have the same solutions deployed for the source and target web applications.
  5. Your target site collection should not exist to avoid conflicts.

Database restore

Ask the SQL team nicely to restore a copy of the production content database of your source web application where the site collection resides, to the target SQL instance.

Note: Make sure the dbo of the target database is the web application service account of your target farm.
When the target database is restored, it’s time to bring it into SharePoint. Here a first decision has to be made:

Scenario 1: Different managed paths

In the case of different source and target managed paths, it’s impossible to directly attach the content database to the target web application.
  1. In order to successfully attach the content database, create a new –empty- web application. Empty means that there are no site collections created in the attached content databases of the web application.
  2. Attach the restored contentdatabase using the following command:
    1
    Mount-SPContentDatabase -Name "RestoredDatabase" –WebApplication http://emptywebapp/
    When the command is finished you get info about your new database:
  3. If your source farm has a different version than the target farm, you have to run an extra command to upgrade your contentdatabase to the right version:
    1
    2
    $db = Get-SPContentDatabase | ?{$_.Name –eq "RestoredDatabase"}
    Upgrade-SPContentDatabase $db
    The upgrade process might generate errors. The most common cause is that the source web application’s solutions aren’t deployed on the empty web application. You may safely ignore this error.
  4. Now that your content database is attached it’s time to move the site to the correct web application and managed path.
    1
    Backup-SPSite http://emptywebapp/ -Path C:\TEMP\backup.bak
    1
    Restore-SPSite http://sharepoint/site -Path C:\TEMP\backup.bak
    Make sure that when you restore your site, you target the right contentdatabase. You can use the –DatabaseName switch to specify where to restore the site collection on the target web application’s content databases.
  5. Make sure that you clean up after your restore was successful.
    • Delete the temporary bak file
    • Delete the restored content database
    • Delete the temporary web application
    • Delete the temporary web application’s content database
backuprestoremanagedpath

Scenario 2: Same managed paths

When the source and target web application’s site collection have the same managed path, it’s possible to directly attach the restored database to the target web application. You do this with the following steps:
  1. Attach the restored contentdatabase using the following command:
    1
    Mount-SPContentDatabase -Name "RestoredDatabase" –WebApplication http://emptywebapp/
  2. If your source farm has a different version than the target farm, you have to run an extra command to upgrade your contentdatabase to the right version:
    1
    2
    $db = Get-SPContentDatabase | ?{$_.Name –eq "RestoredDatabase"}
    Upgrade-SPContentDatabase $db

Result

When a site is moved from production to another environment, all it’s content is moved. Take into account that data might also reside in other places like the managed metadata term store.


 Reference:

http://bramnuyts.be/2012/01/12/copy-site-collection-from-source-farm-to-target-farm/

Saturday, 6 December 2014

SharePoint 2010 - How to Move and Copy Site Without PowerShell?

In the lifetime of a SharePoint deployment, we need to restructure sites like:
  1. Copy one site to another parent
  2. Move one site to another parent
Surely there are PowerShell, STSADM, and Server Object Model ways of doing it. But here I describe the SharePoint Web Interface way of doing it.

The advantage is that we can do it without the help of SharePoint Administrator & Central Administration.

Content Database

Each site collection resides in a content database. In the case of a web application, there could be multiple content databases.

Copying Site

Now let us see how to copy a site from one location to another. Open your SharePoint site & choose "Site Actions" > "Site Settings".

Powershell1.jpg

Choose "Site Administration" > "Content and Structure". In the page that appears, choose the sub site & context menu, then "Copy item".

Powershell2.jpg

You will get the following dialog to choose the destination site.

We are copying the site from one parent to another parent.

Powershell3.jpg

Choose your Destination Parent & click the "Ok" button. Your copy operation should begin now.

Powershell4.jpg

Wait for a few minutes until the contents are copied. You can see the new site created.

Powershell5.jpg

You can try accessing it using the URL.

Powershell6.jpg

The site appears as in the following:

Powershell7.jpg

Moving Site

For moving a site, you can use the Move context menu item & then choose the destination parent site.

Powershell8.jpg

Note: If you cannot see the Site Content and Structure link then you need to activate the SharePoint Server Publishing Infrastructure feature from "Site Settings" > "Site Collection" command.

Powershell9.jpg

References
http://bit.ly/102VB0C

Summary
In this article we have seen how to move/copy a site without using PowerShell.

Reference:

http://www.c-sharpcorner.com/UploadFile/40e97e/sharepoint-2010-how-to-move-and-copy-site-without-powershe/

SharePoint 2010 - Moving Sites and Solutions

Good Article by Jean Paul

In the life span of a SharePoint Deployment, there are sometimes a requirement  to move the site from one location to another.

Types of Moving
There are various types of moving involved.

  1. Moving within the Site Collection
  2. Moving outside the Site Collection
  3. Moving outside the Web Application
  4. Moving outside the Servers
In this article I would like to explore the shortest path available to achieve the scenario.

1. Moving within the Site Collection
Here you are moving one site to another site, within the same site collection. Please note that the content database is the same in this case.

Share1.jpg

This movement could be faster since there is only one URL change required in the background.

You can use the following solution: Content and Structure

Open Site Settings then select "Content and Structure" then select the Site then select "Use Copy / Move action".

Share2.jpg

You will be prompted with the destination site.

2. Moving outside the Site Collection
Here you are moving the site from one site collection to another site collection. Here the content database involved will be multiple & requires some real effort.

Share3.jpg

The common solution for this scenario is: Export & Import.

We can export the source site:

Export-SPWeb -Identity http://server/site -Path c:\export\site.cmp

Then we can import the file at a destination site:

Import-SPWeb -identity http://server/destsite -path c:\export\site.cmp

Before importing, you need to create the destination site with the same template as the source.

Please note that there are 2 types of Export commands:

  1. Export-SPWeb for exporting the site
  2. Export-SPSite for exporting the site collection
Similarly, Import commands are:
  1. Import-SPWeb for importing the site
  2. Import-SPSite for importing the site collection
  3. Moving outside the Web Application
3. Moving outside the Web Application
In this case we can use Step 2 and copy the exported file to the destination web application accessible path.

Share4.jpg

4. Moving to outside Servers

In this case we can use Step 2 and copy the exported file to the destination server accessible path.

Share5.jpg

Things to remember after Move
The following are the check list items after a site collection move:

  • Ensure the home page is correct
  • Ensure lists and libraries are copied
  • Ensure sub sites
  • Ensure permissions especially in top-level site
  • Ensure Features are activated
Since the move operation is Copy & Delete, it is recommended that the delete is done only after:
  1. Ensuring destination site creation
  2. Backing up source site files
There are sophisticated tools available in the market to facilitate copy/move/migration operations. Purchasing them would be a good idea if it saves time, cost & energy.

References

http://technet.microsoft.com/en-us/library/ee428301(v=office.14).aspx

Summary

In this article we have explored the Moving Site scenario & preferred solutions. I am attaching the PowerShell scripts associated.


Reference:

http://www.c-sharpcorner.com/UploadFile/40e97e/sharepoint-2010-moving-sites-and-solutions/