Host header (aka domain names or host
names) lets you assign more than one site to a single IP address on a
web application hosted in the IIS Web server. In SharePoint, you may
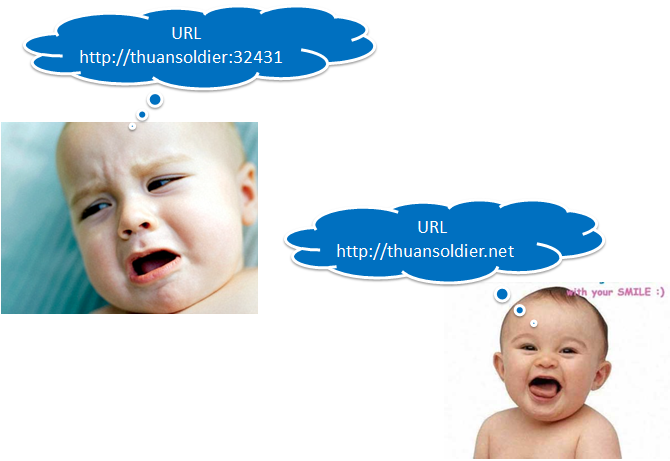
need specific name for your website e.g. http://thuansoldier.net/
instead of an ugly URL like http://thuansoldier:32431. Having a friendly
URL probably makes your end-users much easier to access SharePoint.
They don’t have to remember the port number
In this article, I’m going to show you how
to configure Host Header in SharePoint through DNS configuration and
IIS. You can also use PowerShell script I’ve written here.
Create new Web application
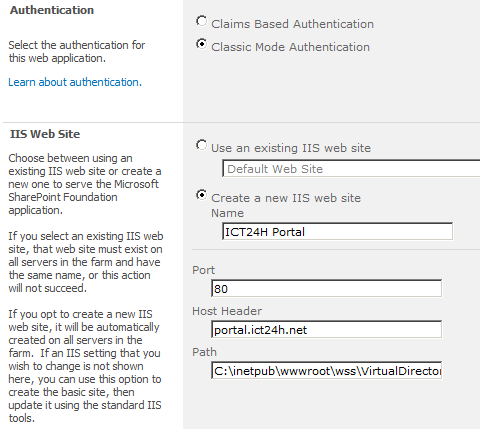
Open Central Administration > Application Management > Manage web applications (under Web Applications). Click New in Ribbon.
Select Classic Mode Authentication by default but you can go with claims-based authentication to leverage tons of capabilities from it. Under Name,
type the name of the new Web application. Use default port 80 as it
will be used through HTTP. You can select another port but make sure it
doesn’t conflict with any common port (e.g. 21..). Under Host Header, type the full domain of the web application you are going to use.
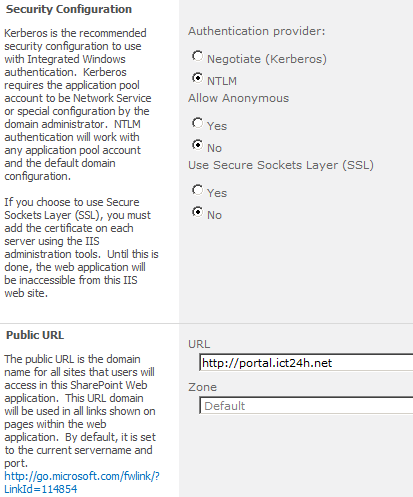
At Security Configuration settings, keep all by default all.
 Use existing application pool (optional) Under Database Name at the Database Name and Authentication, remove GUID and keep the name of content database as simple as possible.
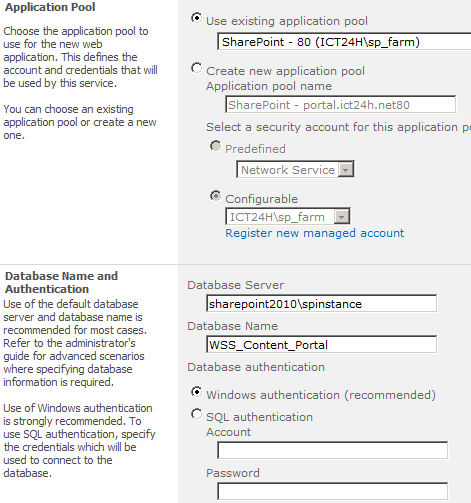
Select service application connection if you have and then click OK to create new Web application.
Register the host header in DNS Server
In DNS server, create new host A by click New Host (A or AAA)
 Type host name under Name, and the SharePoint server’s IP address. Click Add Host.
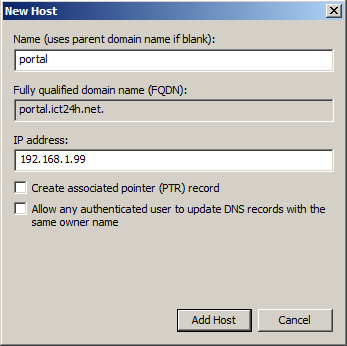
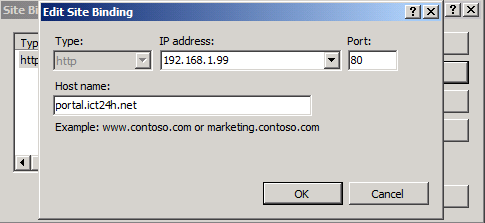
Configure host header for a Web application
In IIS Manager, right click the Web application you need to assign host header to and then click Edit Binding. In Site Bindings dialog box, click Edit. At IP address option, select IP address of the SharePoint server. Under Host name, type your host name. Click OK.
Open Central Administration > Application Management, under Web Applications , click Configure alternate access mappings. Verify that the URL for the default zone is set correctly.
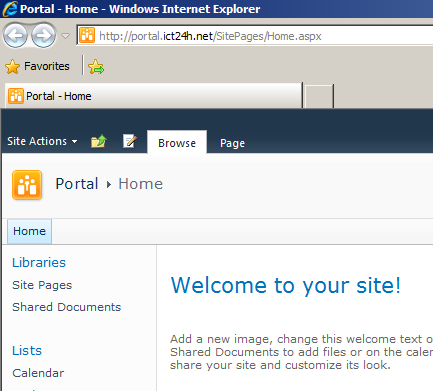
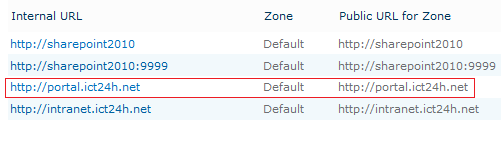 However, when you open portal.ict24h.net whether in Internet Explore 8 or Mozilla Firefox 3.5, you will encounter 404 Page Not Found error. What’s up? Yes, you haven’t created Site collection in your Web application yet.
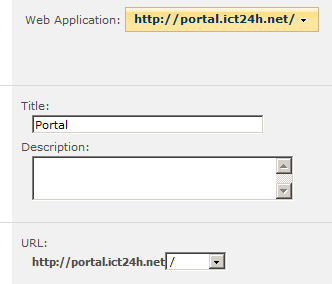
At Central Administration, click Application Management > Create site collections (under Site Collections). Please notice your Web application that you have just created namely portal.ict24h.net.
I want to share basics in this post because I saw some questions about it in SharePoint 2010 – Setup, Upgrade, Administration and Operation.
I hope this post helps everyone.
Reference:
http://thuansoldier.net/?p=1323
No comments:
Post a Comment